
This guide is the collective experiences and wisdom of the community distilled down to an easy to digest guide. Each section provides details, and I provide a recommendation at the end. References to the source material providers are included via:
- adding their logo to images sourced from their material
- images linking back to their original source material
- a text mention with them linked
Table of Contents
- What is Speedpaint, And Is It Right For You?
- Primer Undercoats and Their Effects
- Layers
- Swatches
- Conclusion
What is Speedpaint, And Is It Right For You?
The Army Painter created Speedpaint as a competitor range of paints to Games Workshop’s Contrast Paints. These acrylic based paints are designed to provide highlights, base coat, and recess shading in a single layer. This is achieved by having a consistency that wants to settle at the bottom but sticks along the way (ie. peaks will have less and valleys will have more pigment).
Speedpaint and Contrast Paint are targeted towards beginners though they have advanced applications as well. These 2 products are not 100% interchangeable, but the fundamentally try to serve the same market/needs. These paints might be a good fit for you if you desire the following:
- Paint miniatures as quick as possible
- Have highlights and shadows that naturally follow the contours of the plastic
- less control over the shading where placed
Summary Comparison of Speedpaint vs Contrast Paint
All items in the comparison will be elaborated in the following sections.
Speedpaint
- Pulls to recesses more
- More consistent viscosity/feel across colors
- May require more varnish
- Reactivates
- Cheaper
Contrast Paint
- More controlled application
- More distinct colors
- Can paint acrylic directly over it
- Doesn’t reactivate
Primer Undercoats and Their Effects
Speedpaint is very thin and transparent, so whichever primer you select will have a very noticeable outcome. The varnish sheen you use on your primer will also determine how much pigment is pulled from the peaks and raised edges. It’s important to note that the final sheen can be altered with a final varnish layer. The following sections will show the differences of the various combinations.
The Army Painter recommends
Use a Matt White Colour Primer to get the best results with your Speedpaint.
Presumably, the reasoning behind this is that the white matt primer allows the Speedpaint hue to show without influence of other colors and also is the least amount of effort from the painter. If you’re willing to put more energy in and want a specific look, the following sections will show you what returns you can get.
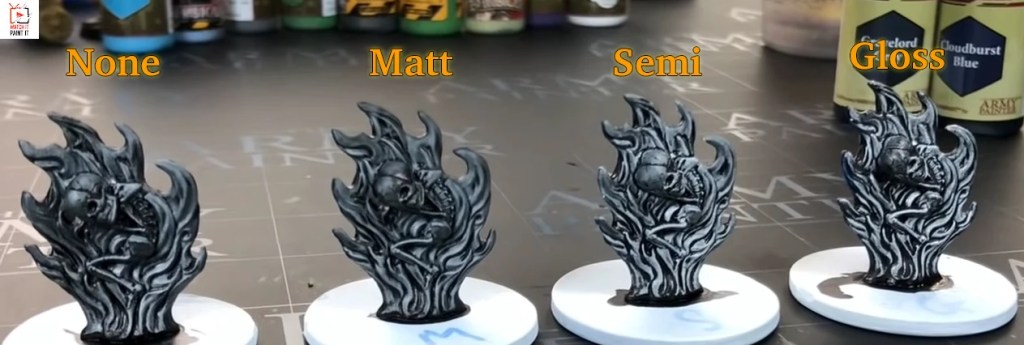
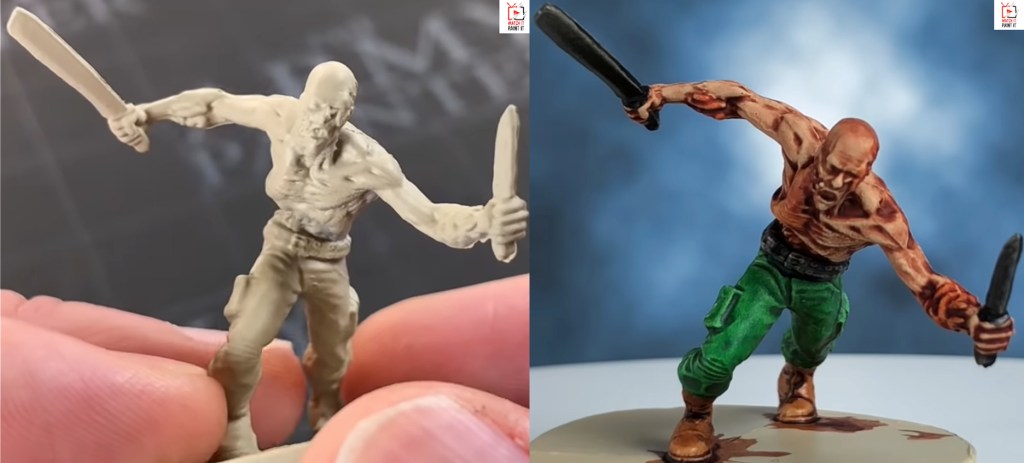
Matt White + Matt, Semi-Gloss, & Gloss
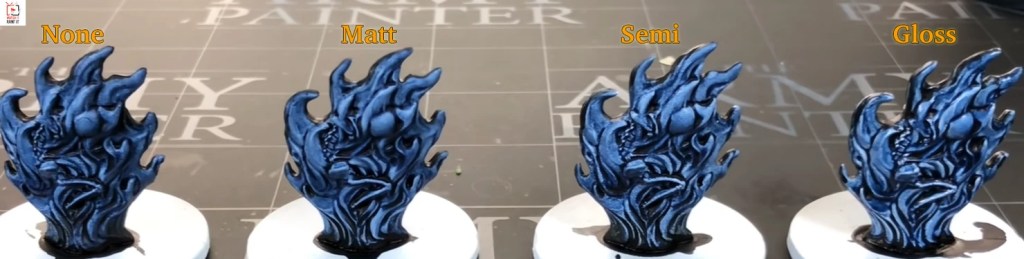
Takeaways:
- Varnish makes the Speedpaint appear smoother
- The more glossy the varnish, the greater the contrast of color
These miniatures were painted by Watch It Paint It, who did a whole series on the various intricacies of Speedpaint.
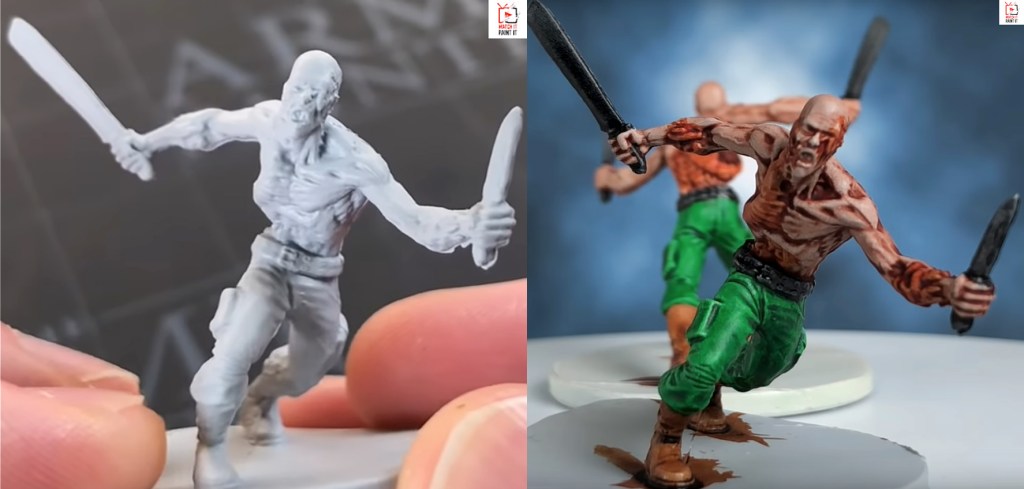
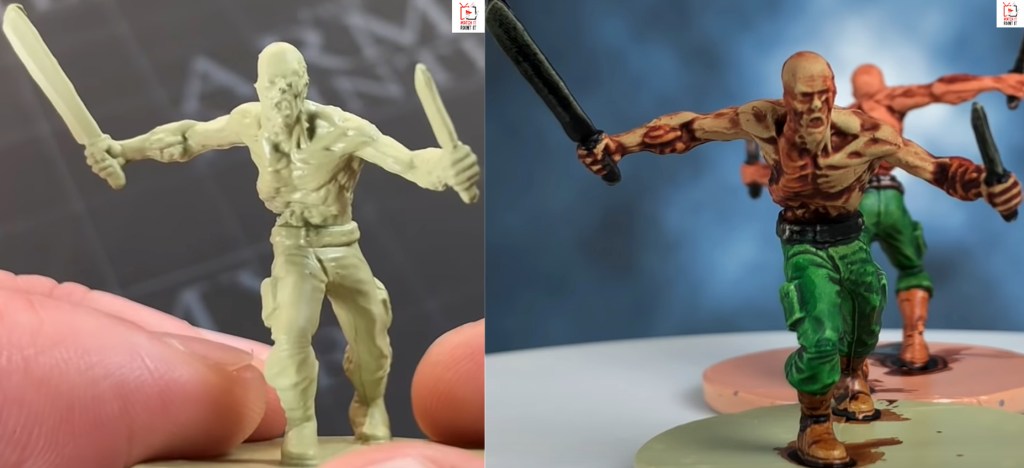
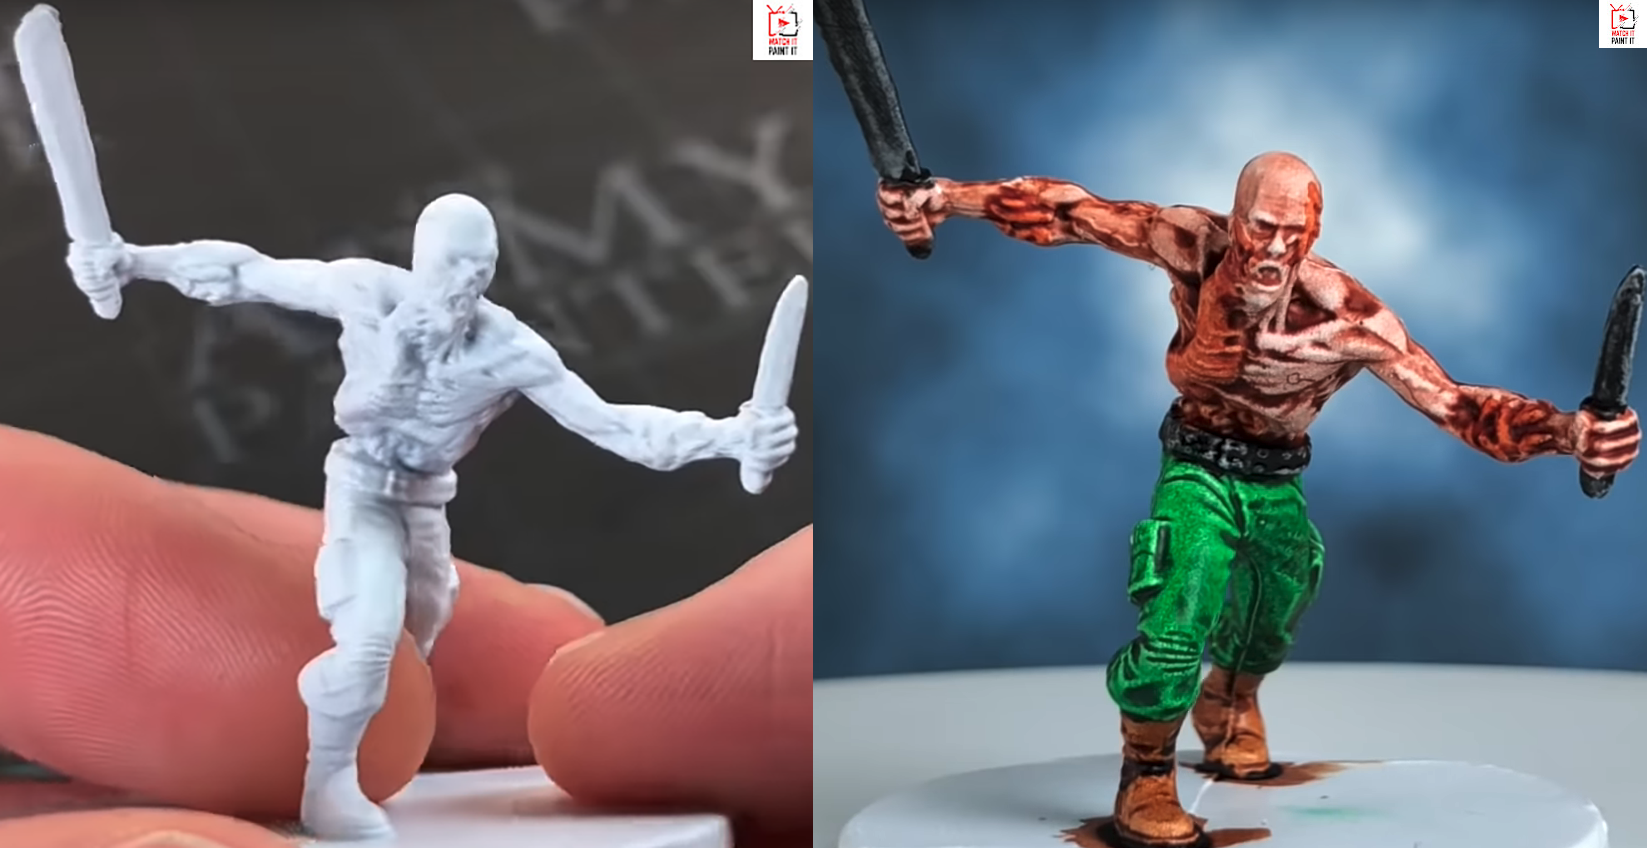
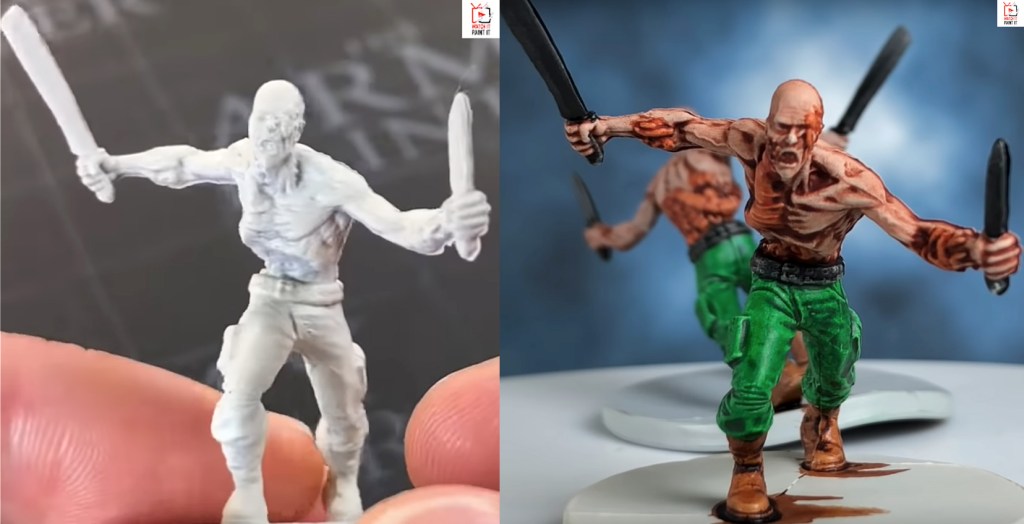
Zenithal Highlight
Zenithal Highlight is a technique where you capture the light information (ie. where a light source would shine on). For more information check my Zenithal Highlight page. In particular notice how the face isn’t catching as much highlight as the hair. When you look at the miniatures with color you can see how these kinds of differences translate.

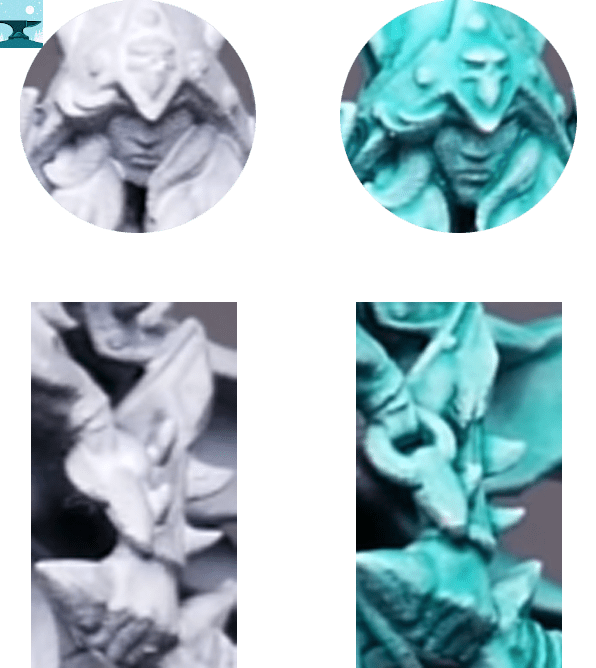
Takeaways:
- Speedpaint preserves the zenithal highlights
Unfortunately, I do not have a Zenithal Highlight combined with an undercoat of varnish example. If you did that, you would capture the light information (from the Zenithal) and increase both the smoothness of the color and the contrast of color for different peaks/recesses.
These miniatures were painted by Goobertown Hobbies, who did a whole series on the various intricacies of Speedpaint.
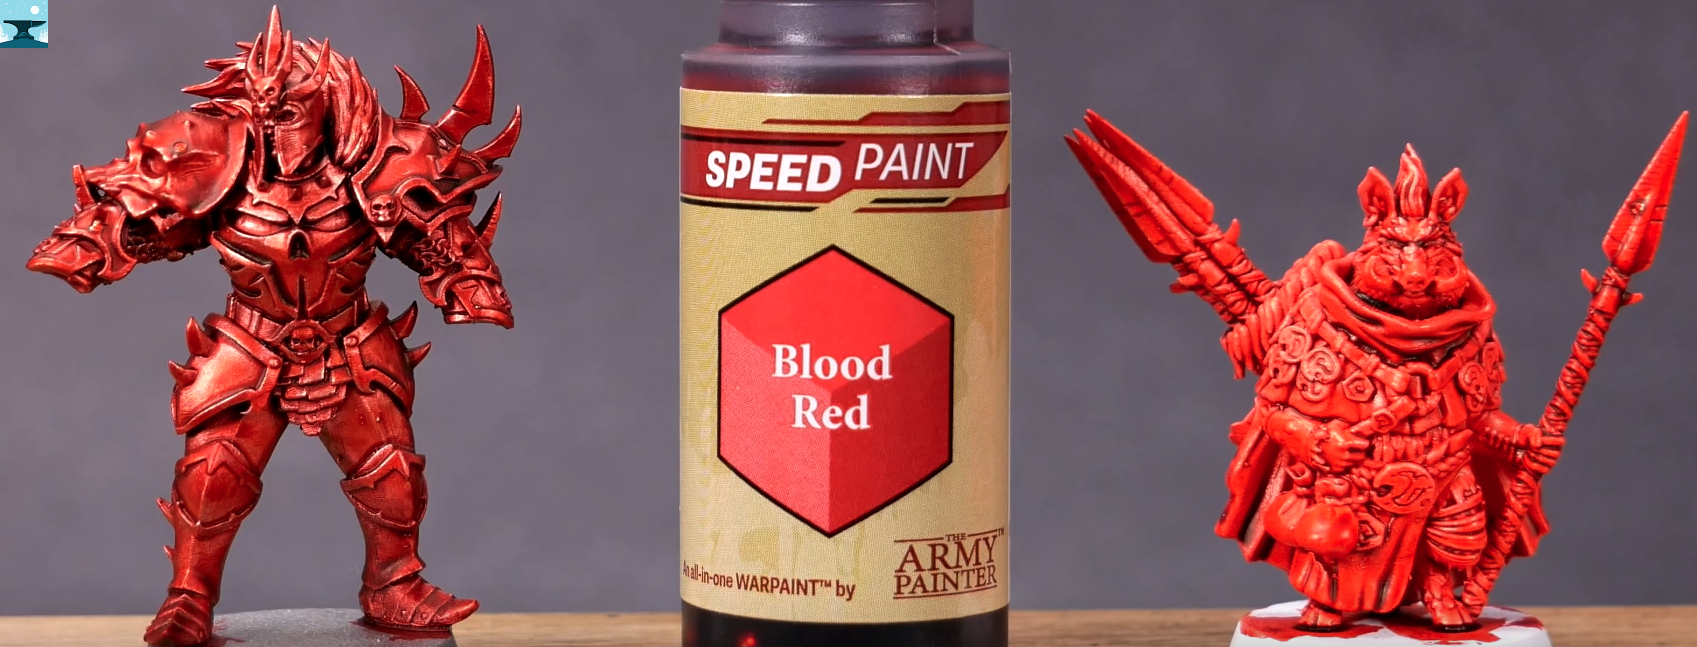
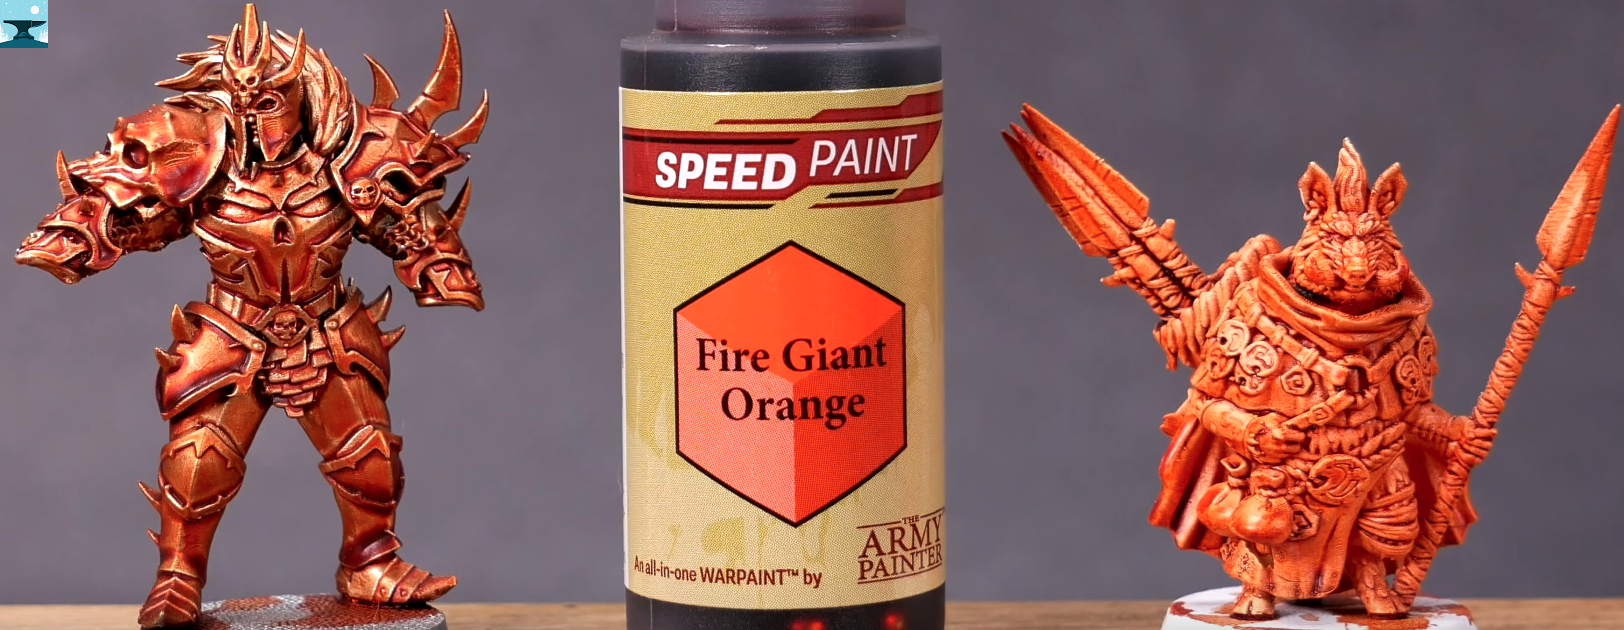
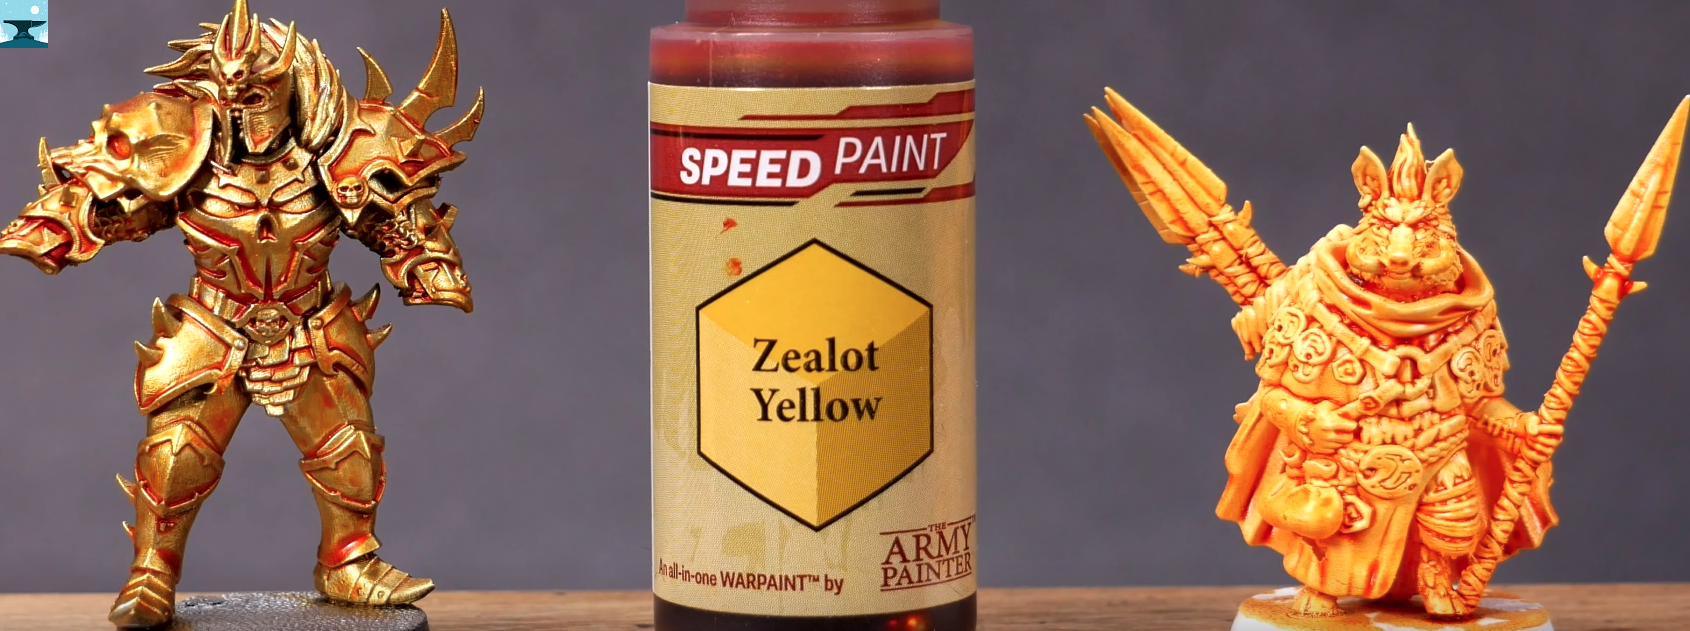
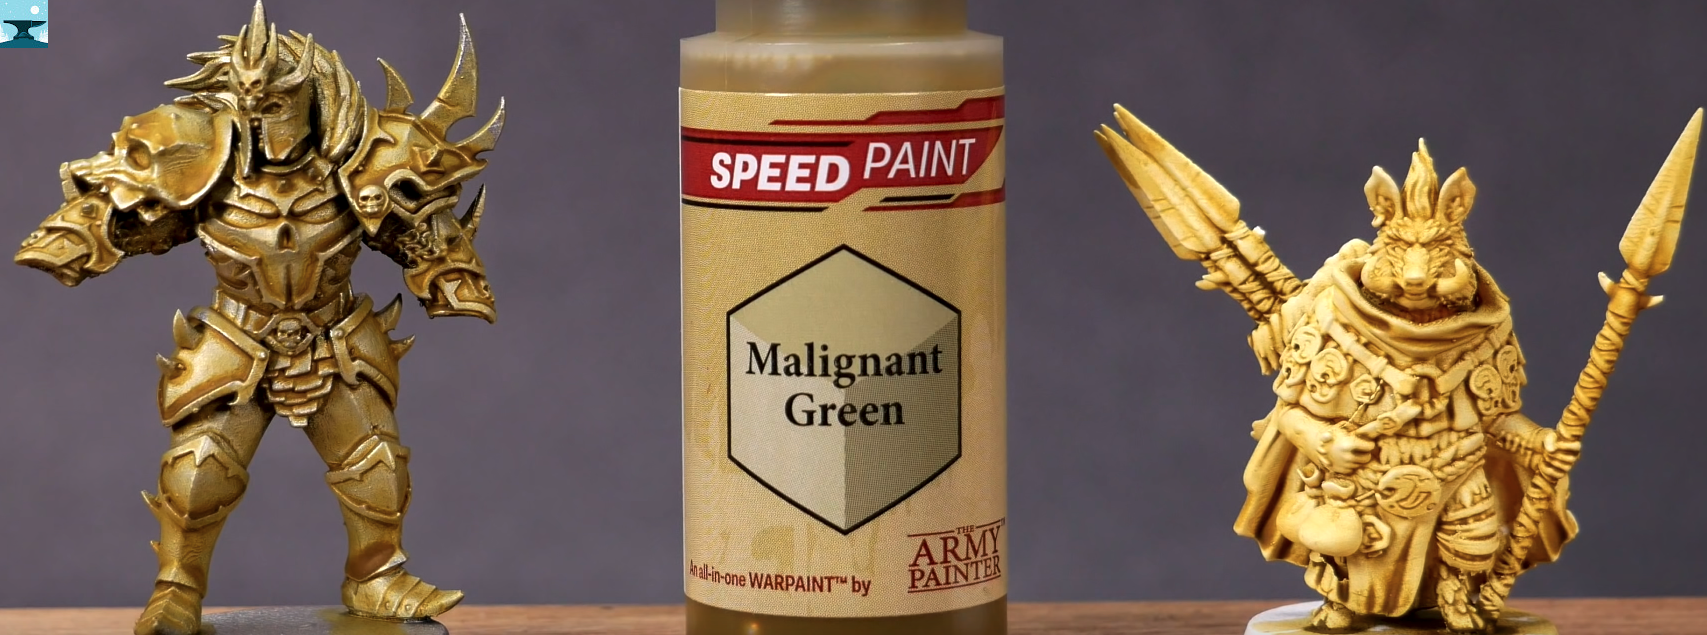
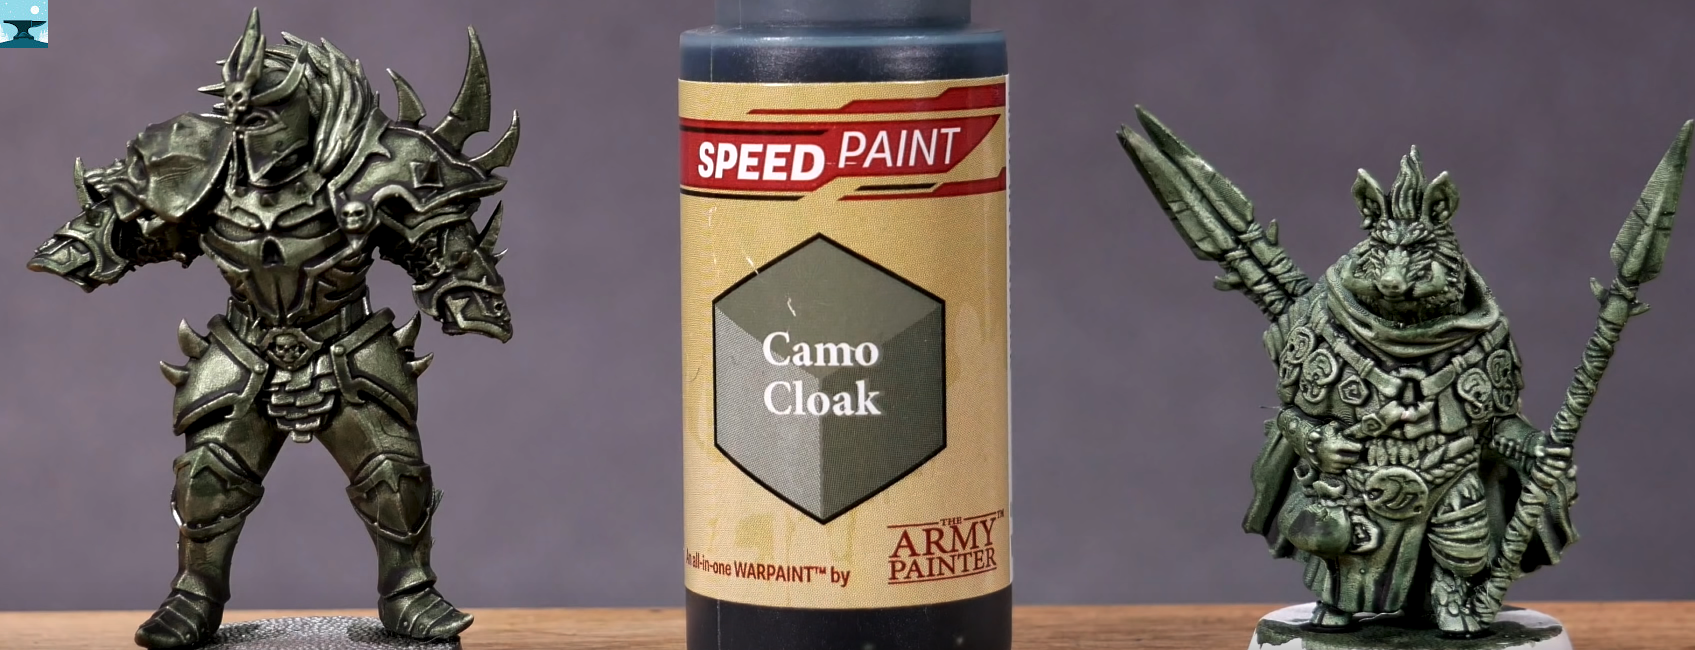
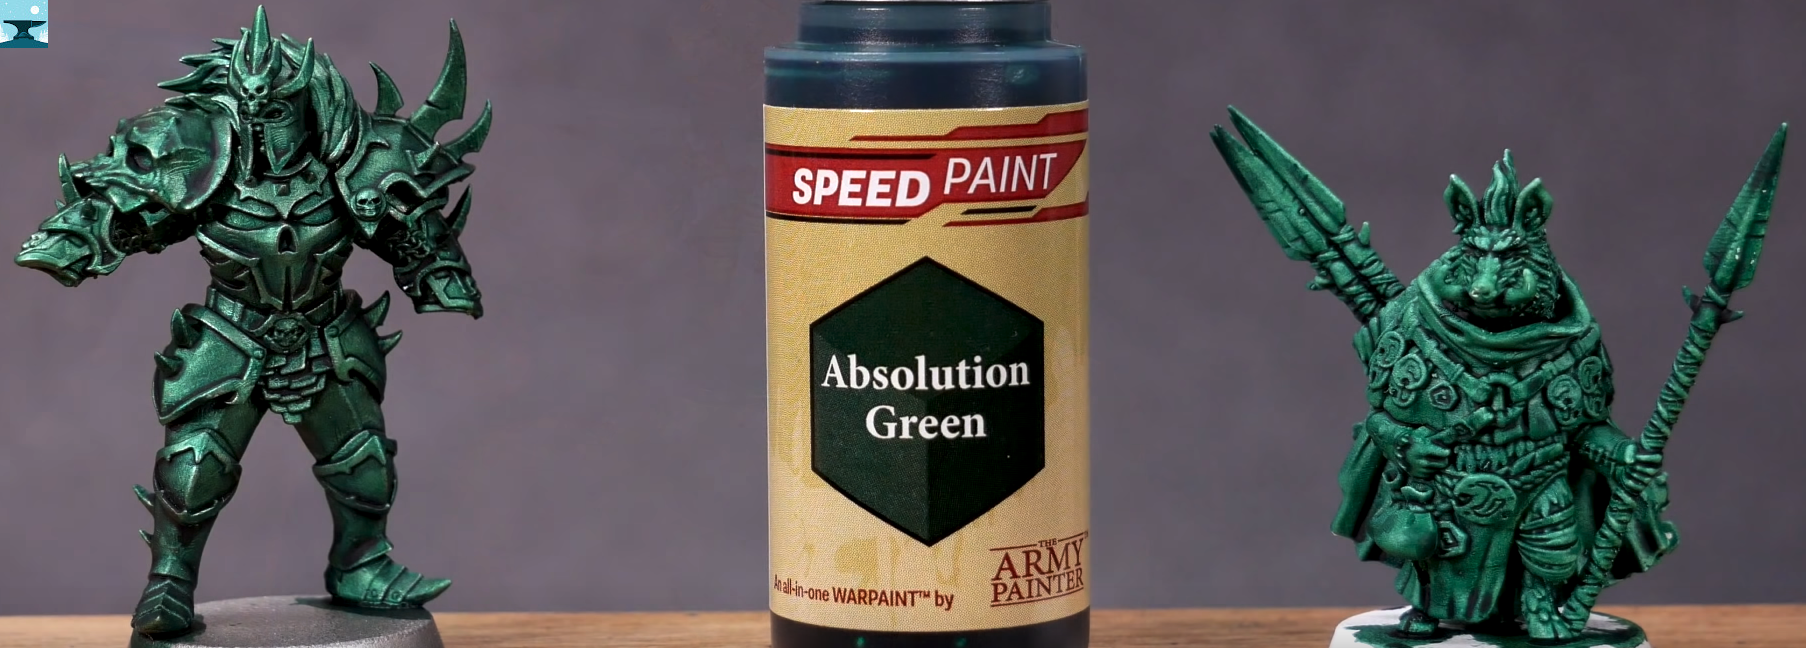
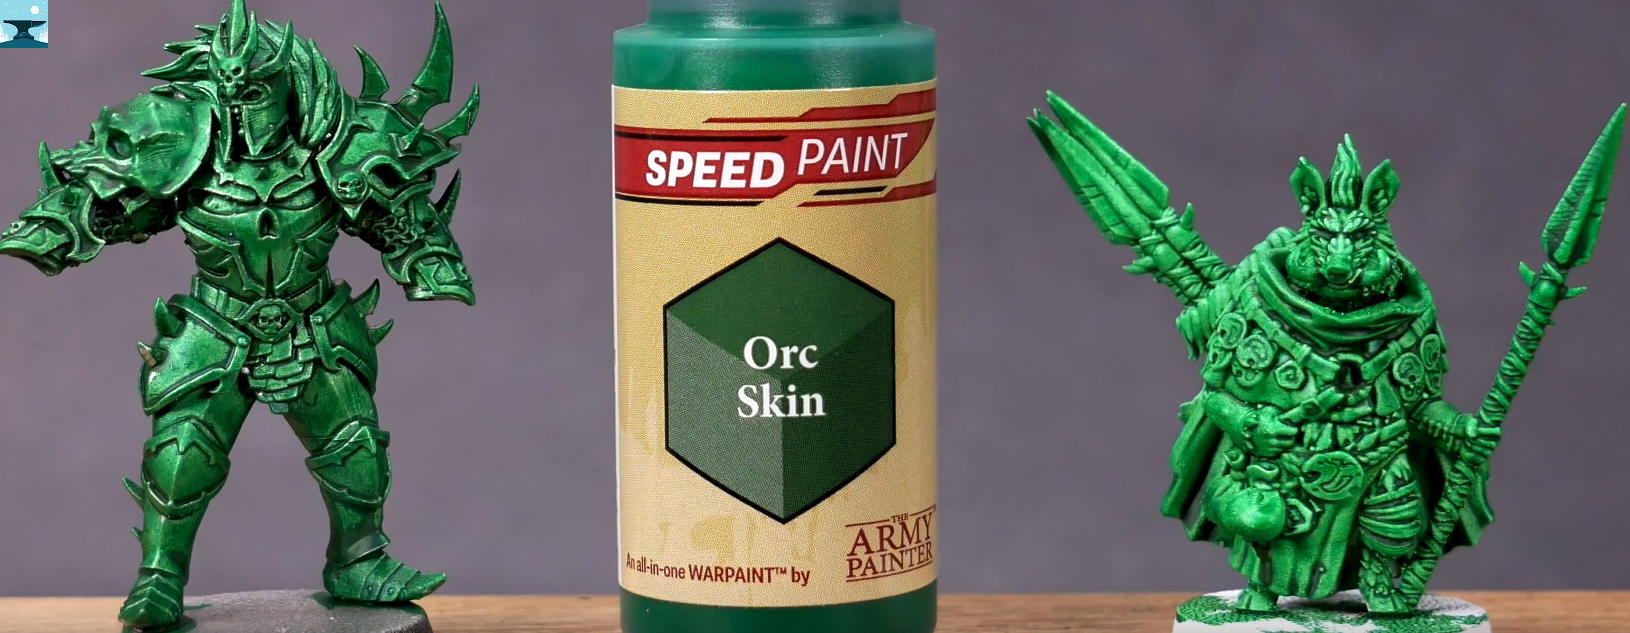
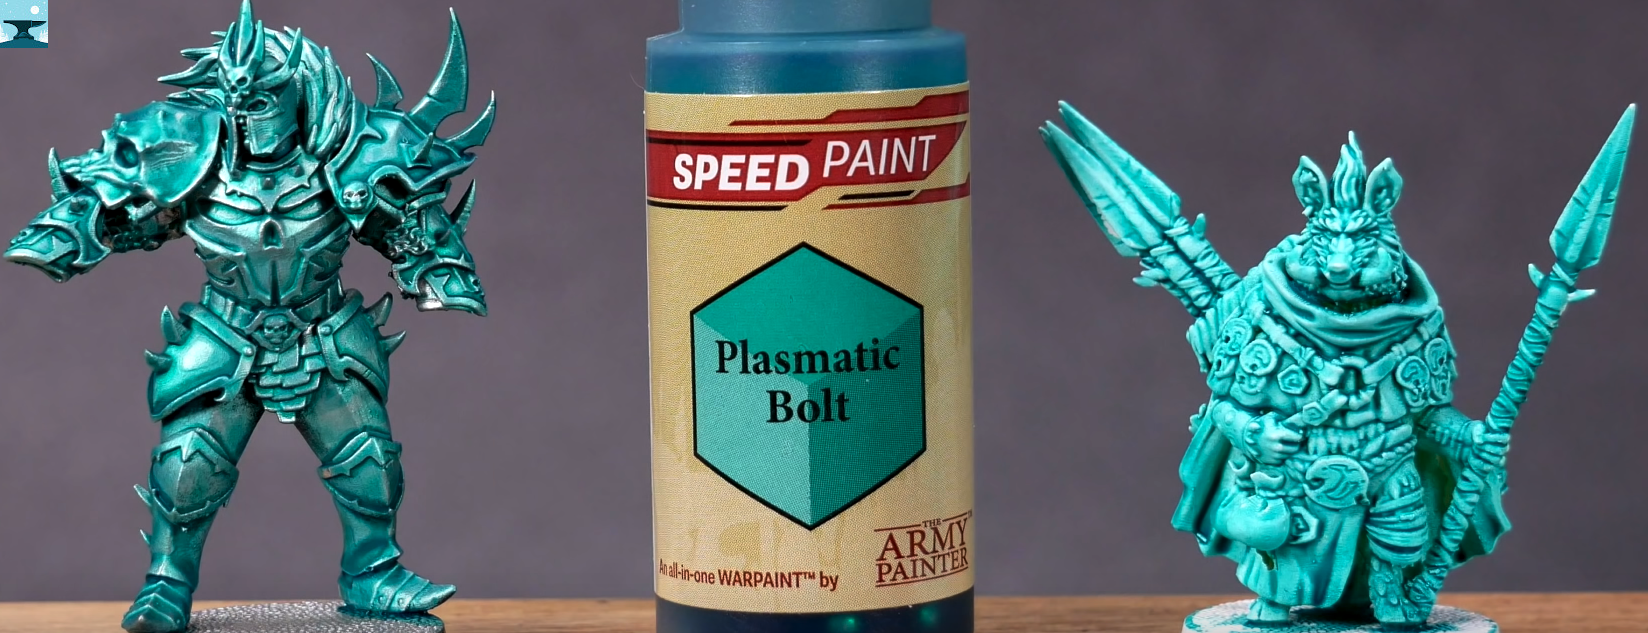
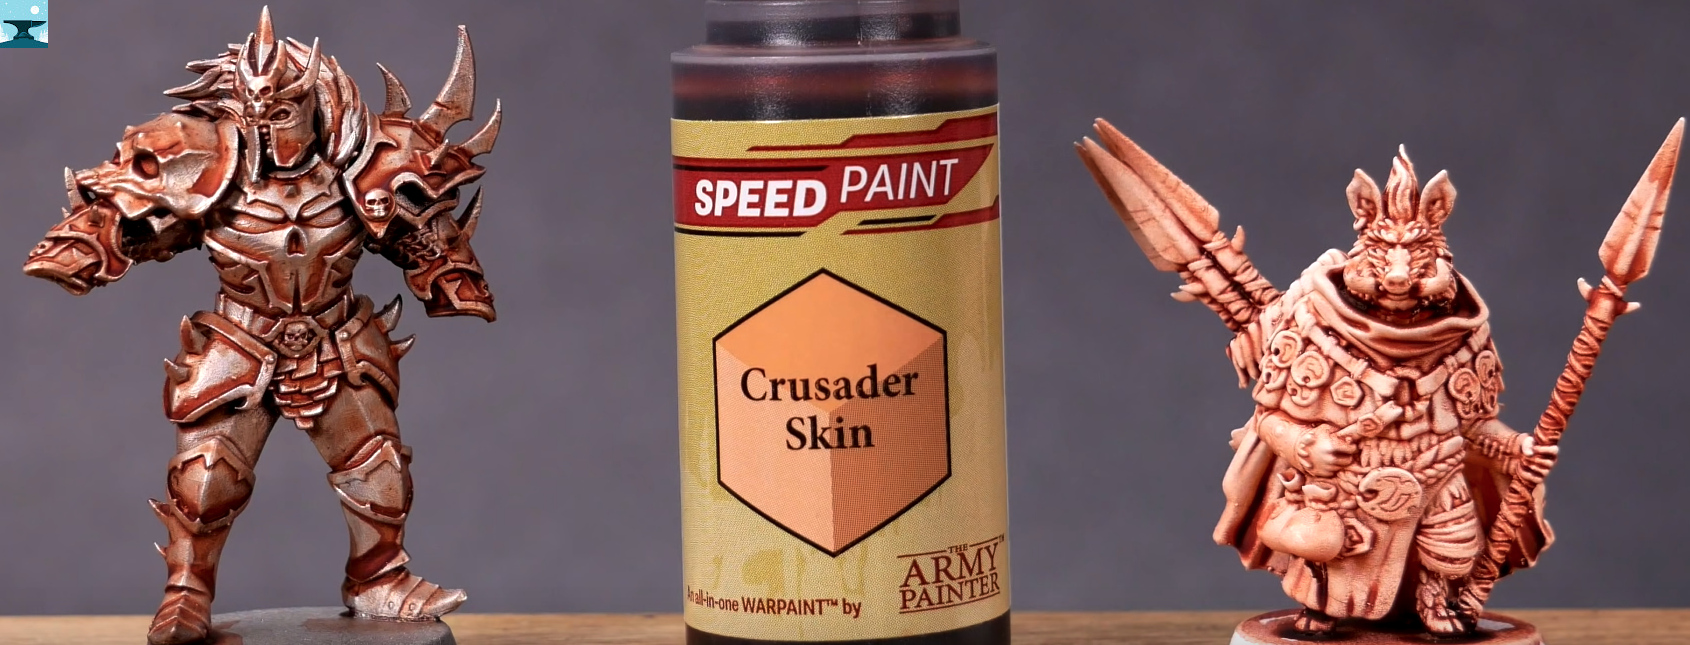
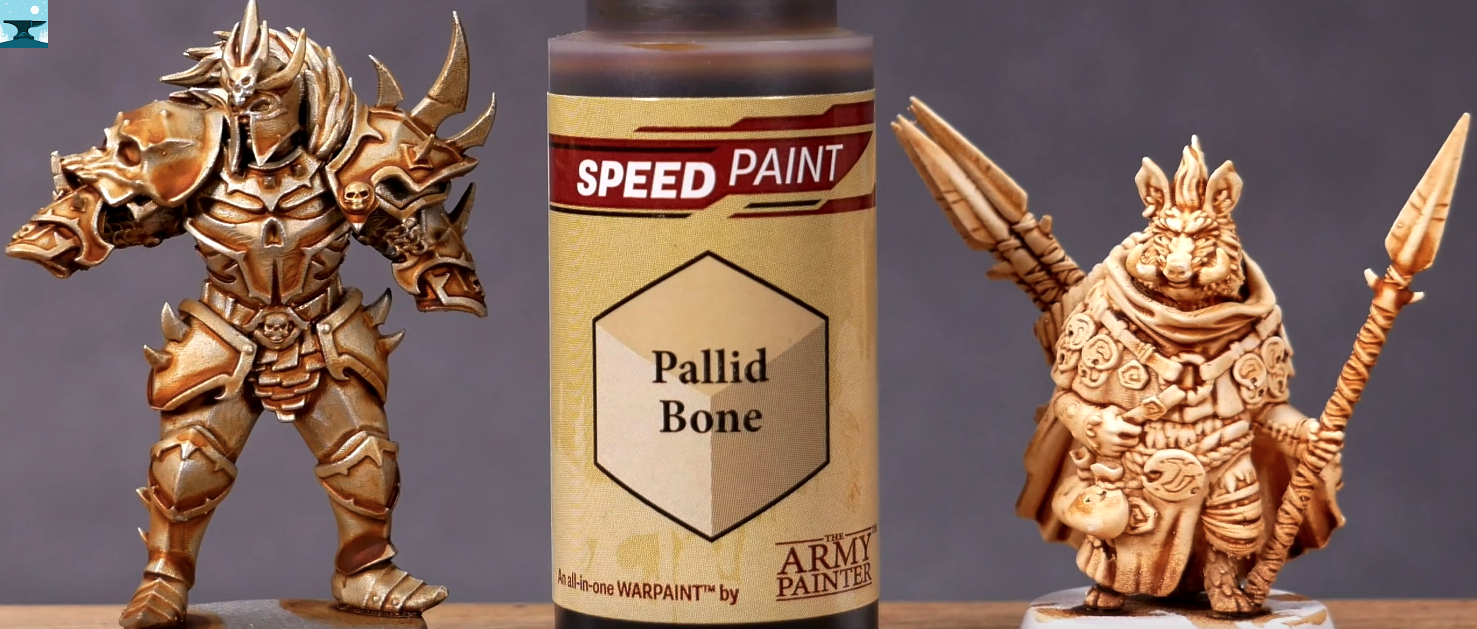
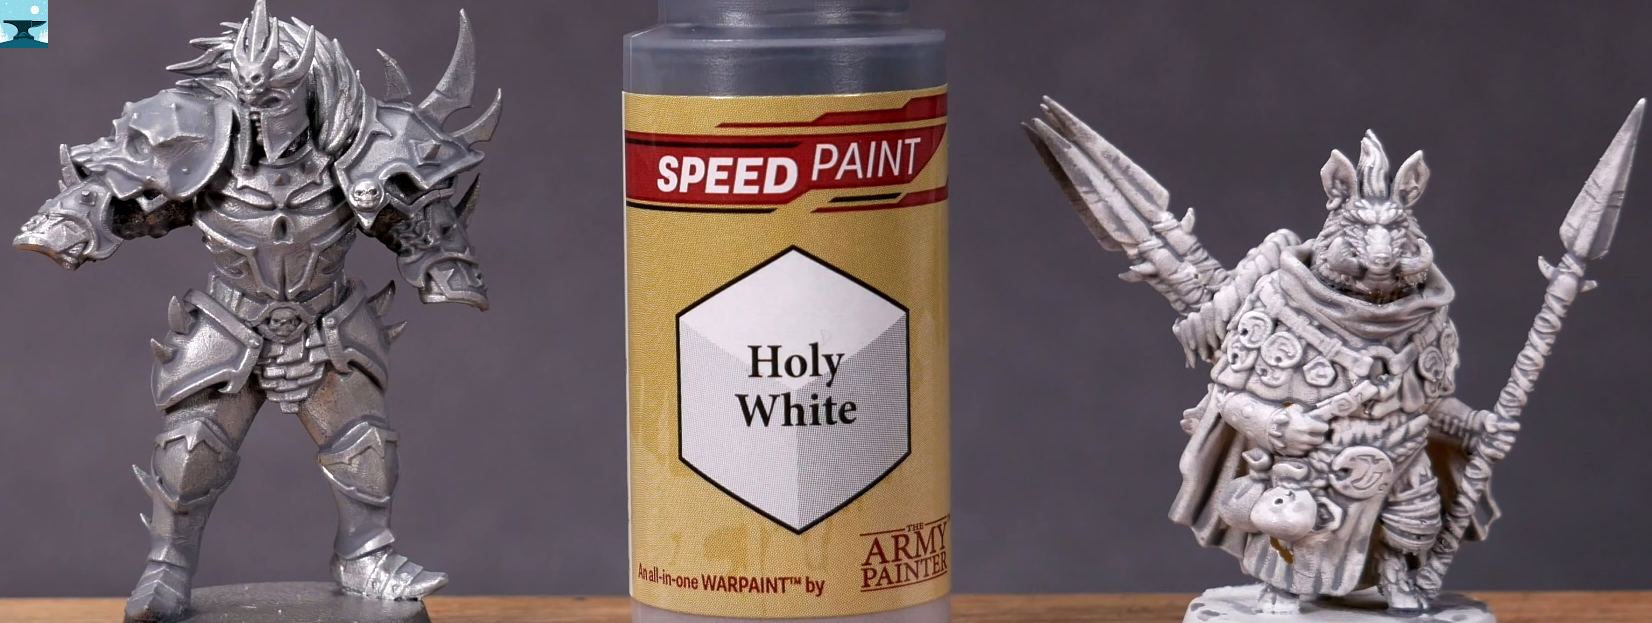
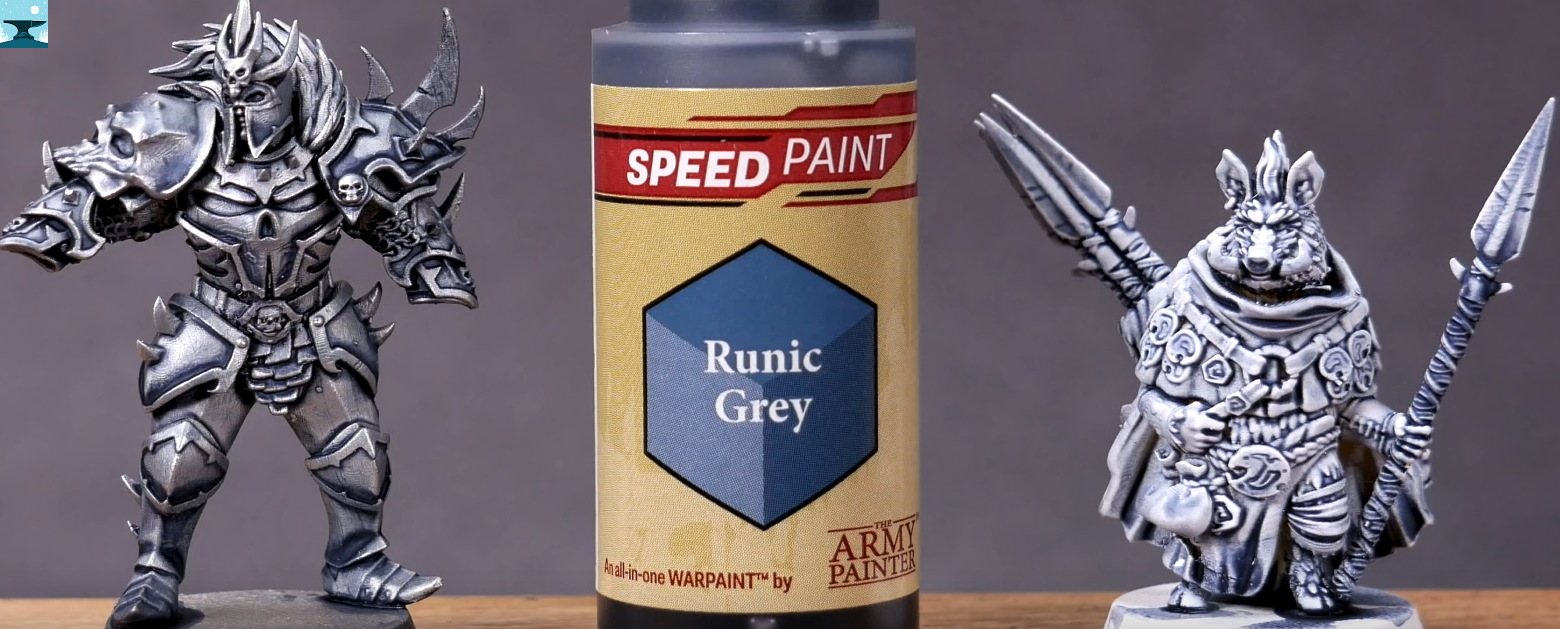
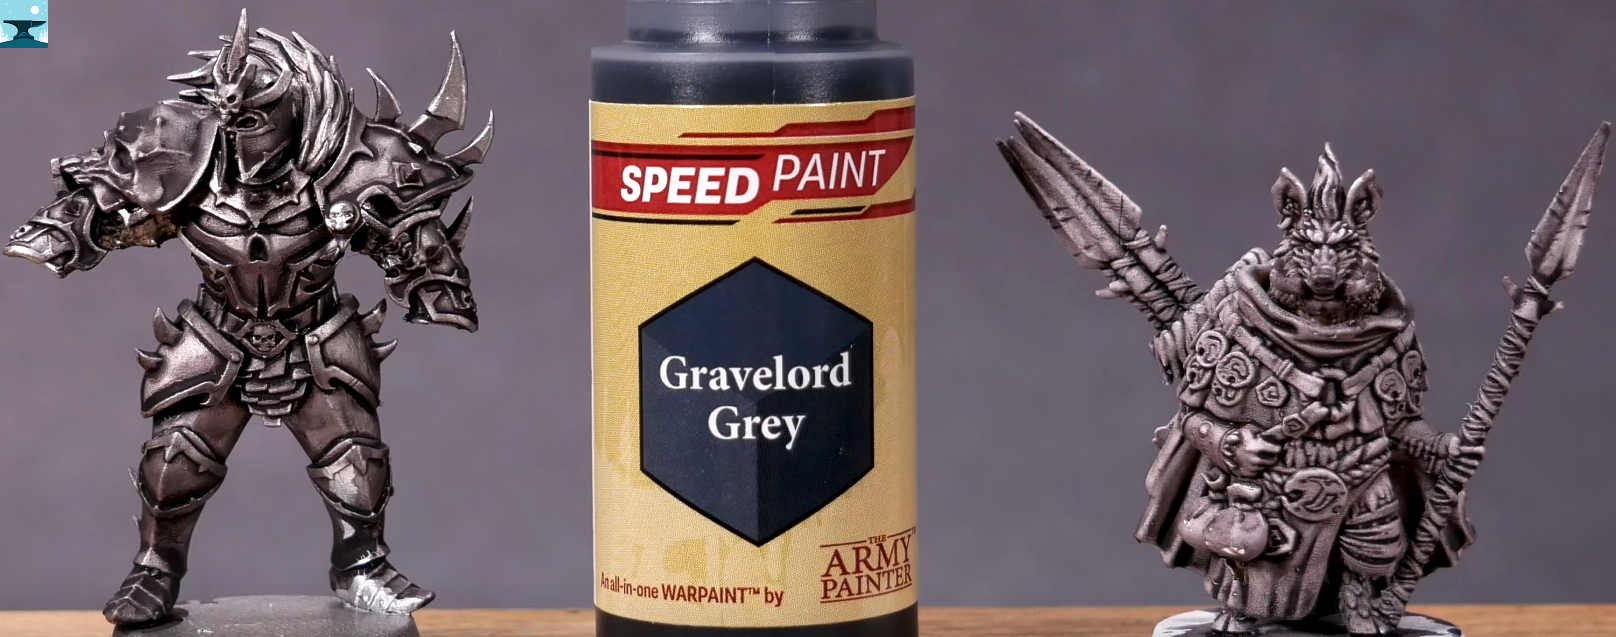
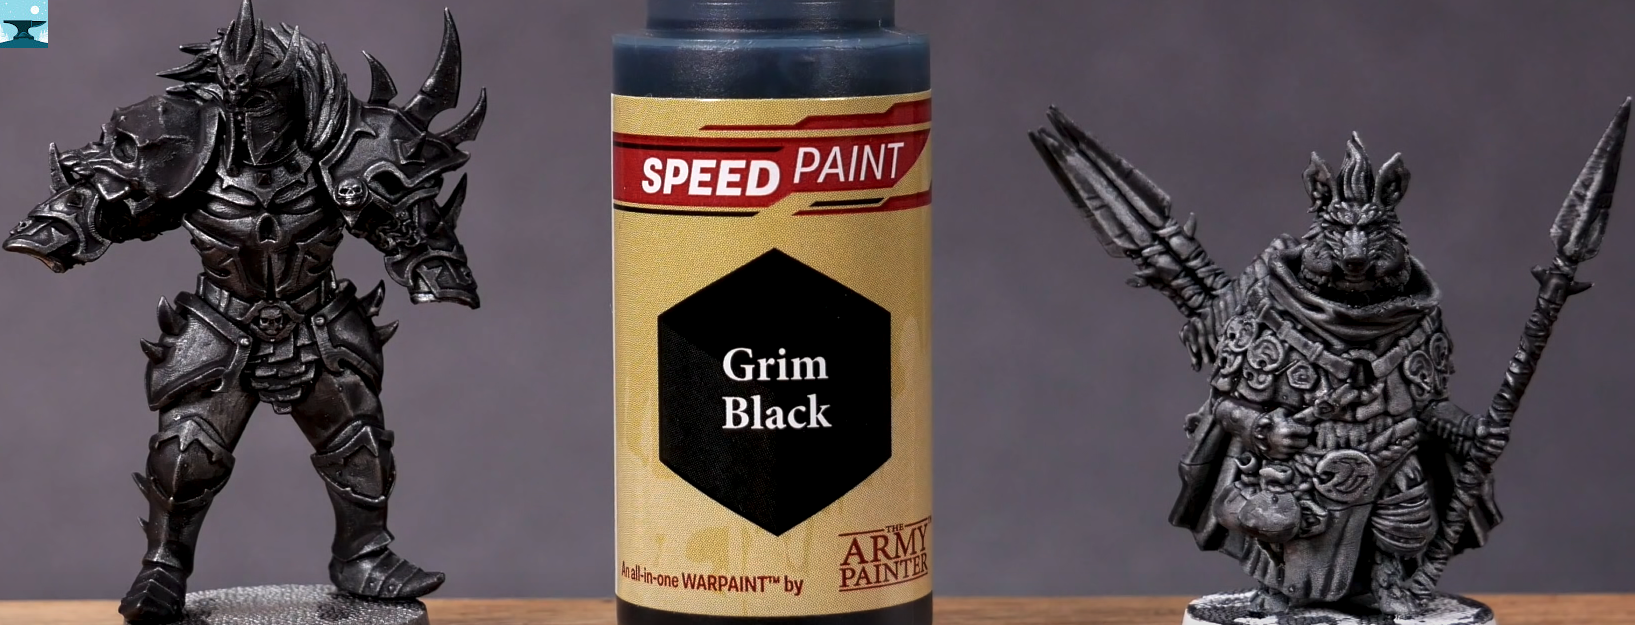
Colored Primers
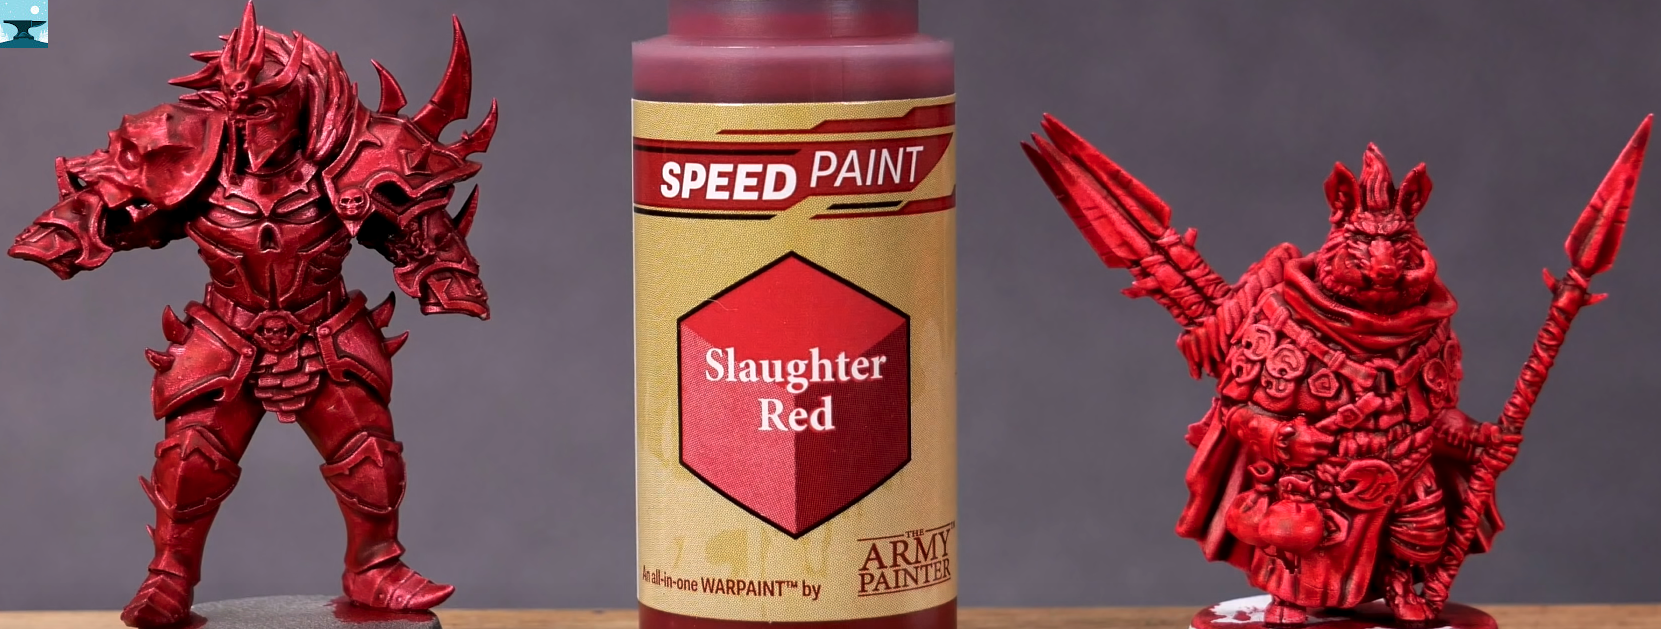
WatchItPaintIt uses various colored primers via Spray Cans with the following Speedpaints:
- Fire Giant Orange
- Hardened Leather
- Orc Skin
- Crusader Skin
- Gravelord Grey
The Contrast primer smooths out the finish so there’s less spotting, but it’s more expensive.
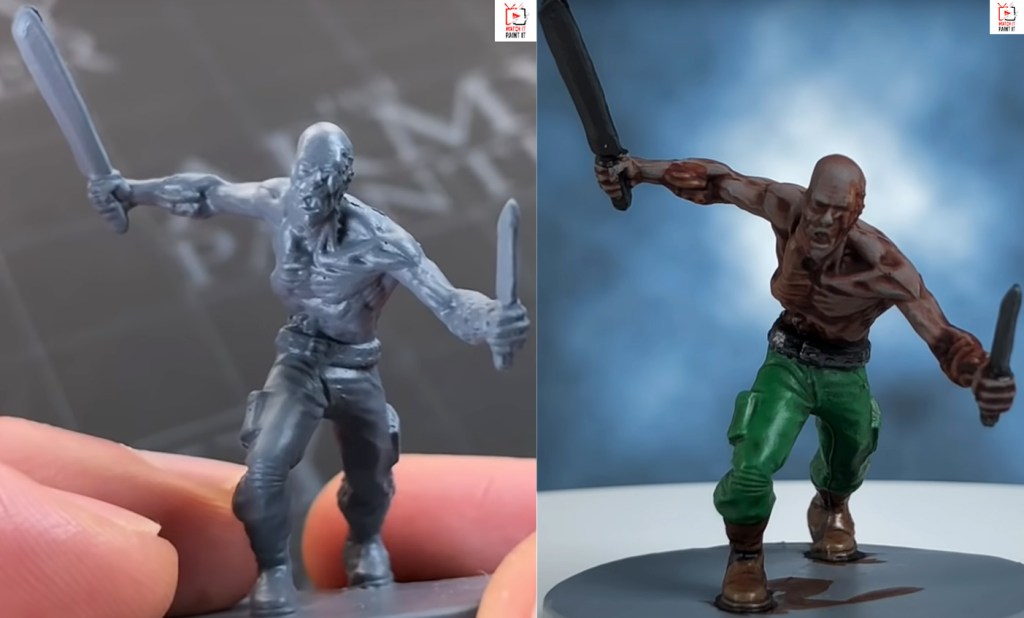

Takeways:
- Primer will directly effect color scheme above
- Metallic primer sheen is preserved
- Speedpaint on top of primers designed for Contrast Paint have smoother color
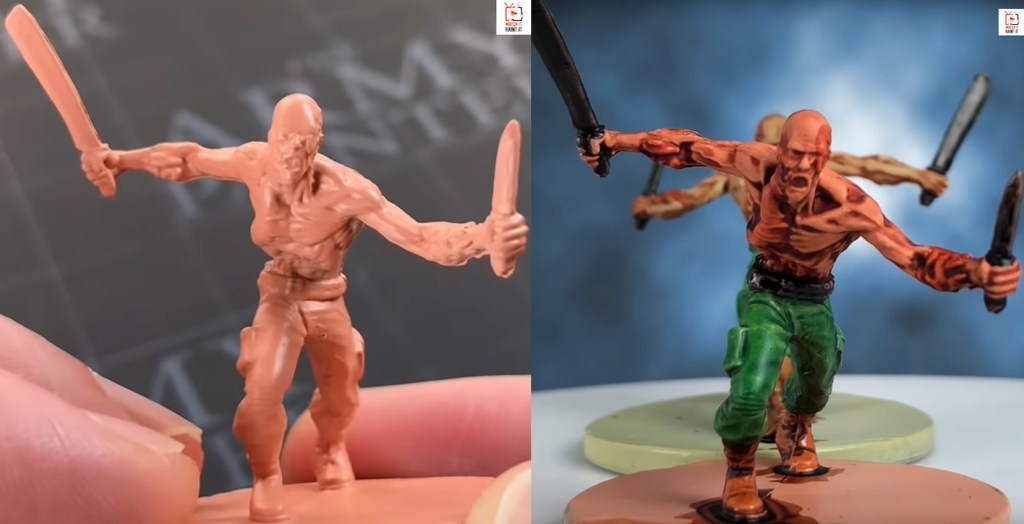
Layers
Coats
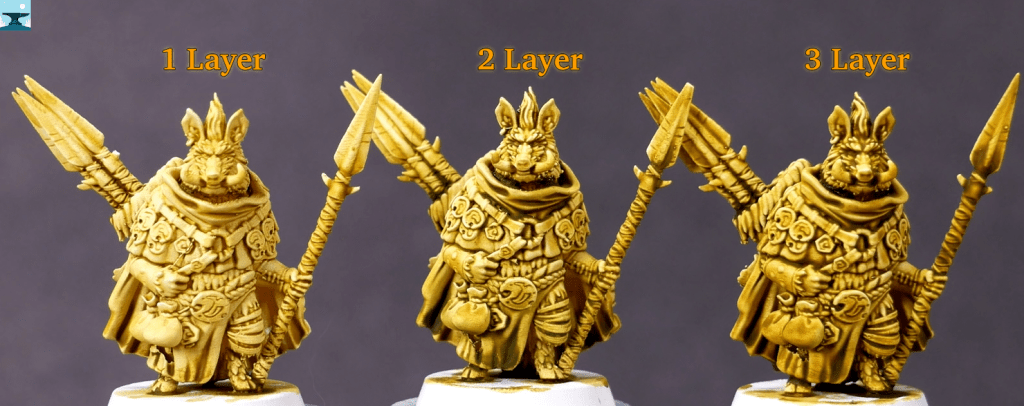
It’s worth noting that The Army Painter intends this to be a 1 layer solution. This section explores ignoring that advice. Each coat was given 8 hours to dry over a matte white primer.

Reactivation
After being fully dry (hours), it can be reactivated by applying water to it. Juan Hidalgo demonstrates this in the video the image below is created from. This is important behavior, because you may be tempted to layer Speedpaint without realizing this interaction.
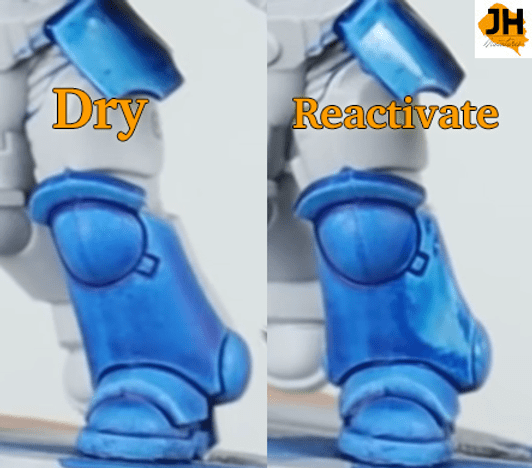
Takeaways:
- Do as The Army Painter suggests, and just put on one layer, or
- Use varnish on top of Speedpaint layers, if you’re doing more work on that segment of the miniature
Thinning
These were all thinned using Speedpaint medium at the ratios specified in the images.

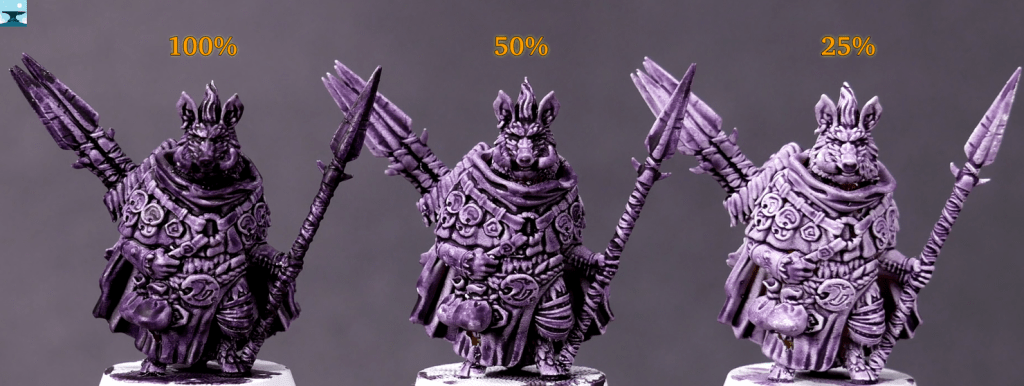
Takeaways:
- Thinning with Speedpaint medium makes the colors lighter and retains the pulling towards the edge effect
Airbrushing
Airbrushing is not what is intended by The Army Painter but it’s worth noting the performance. It doesn’t seem to apply any unique effects.
Goobertown Hobbies shows how a monochromatic look would be.

But when we look at Squidmar Miniatures we see what blending and treating it like shading can do. The darker shadows are Absolution Green, while the highlights are a mixture (1 Orc Skin : 3 Malignant Green). The commentary seems to be this is an option if you really like the hue/saturation.
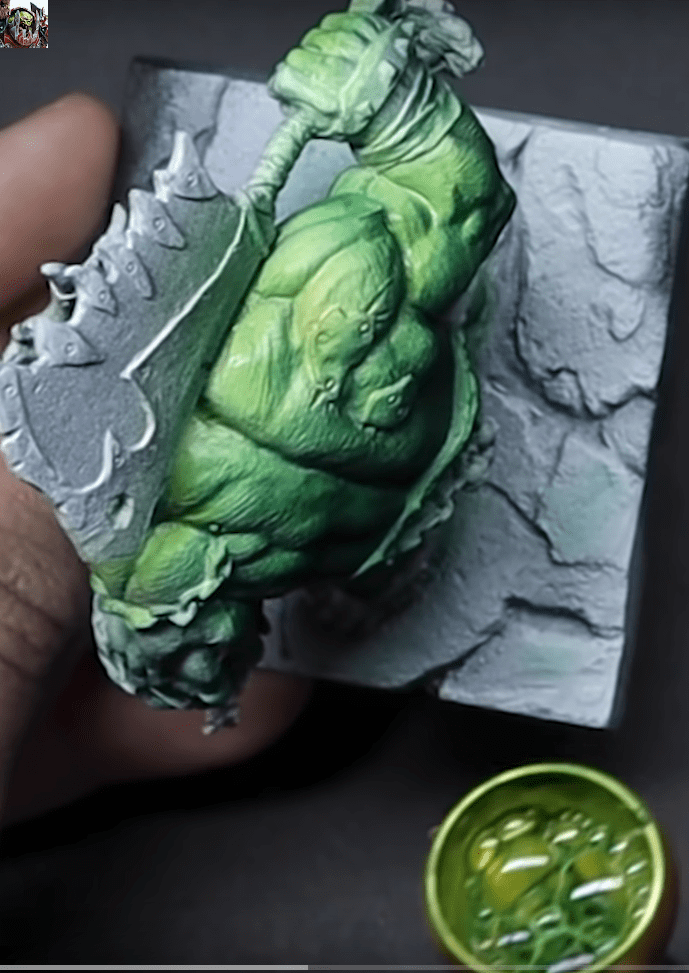
Takeaways:
- No unique benefit from airbrushing
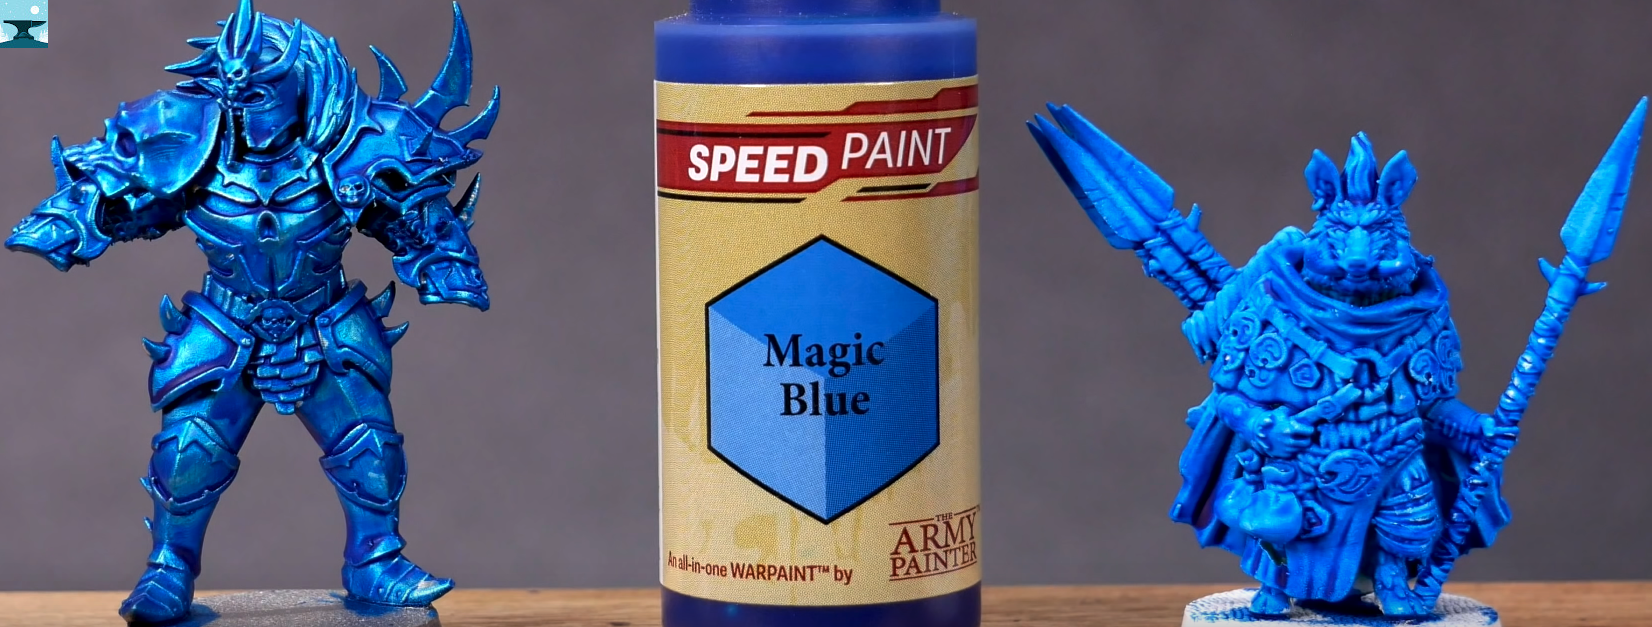
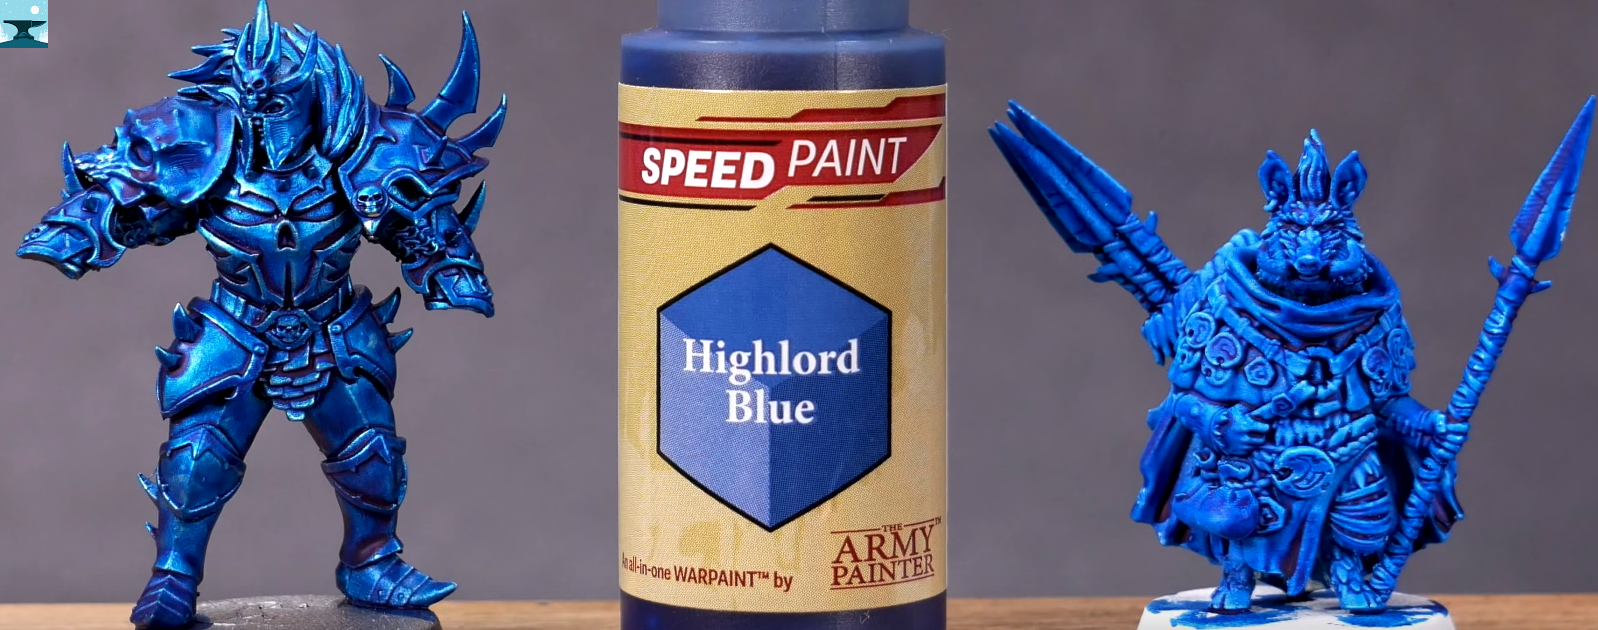
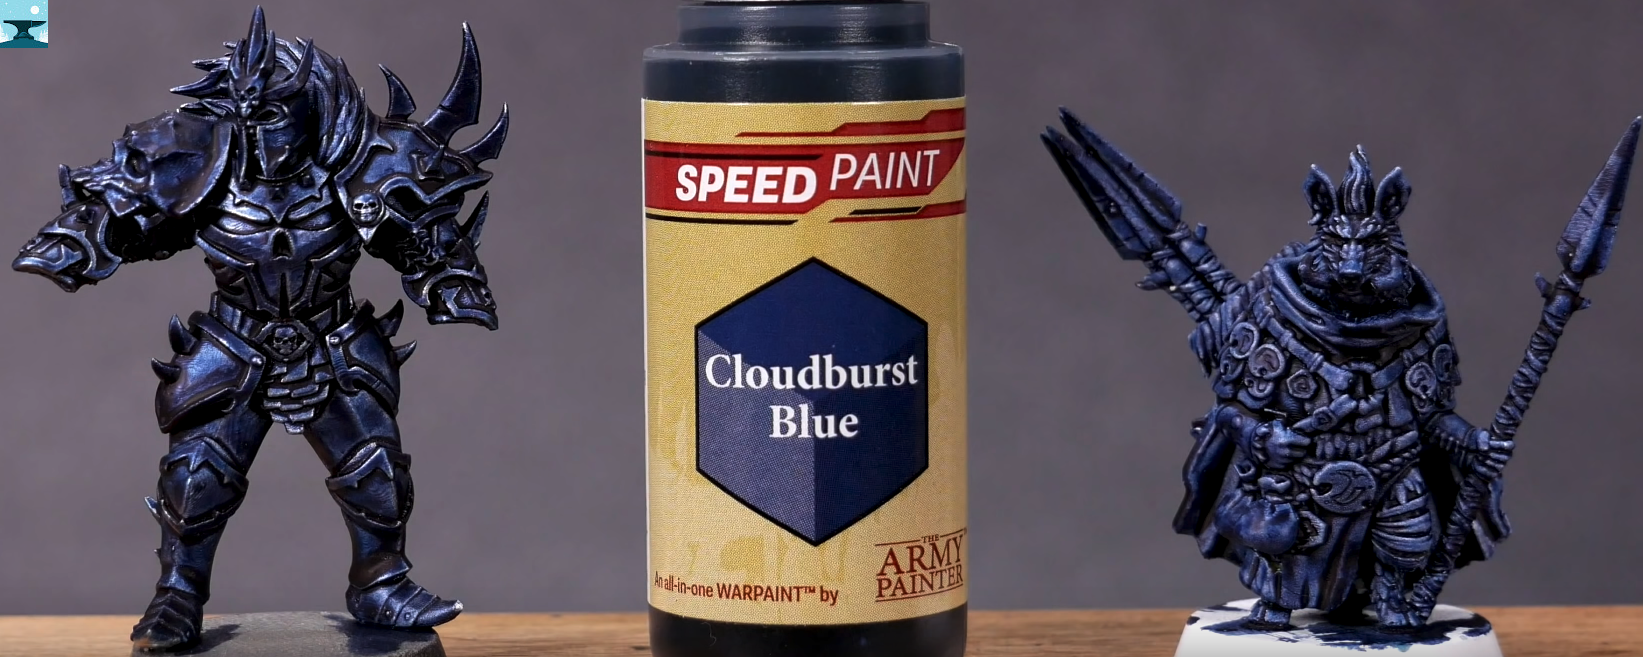
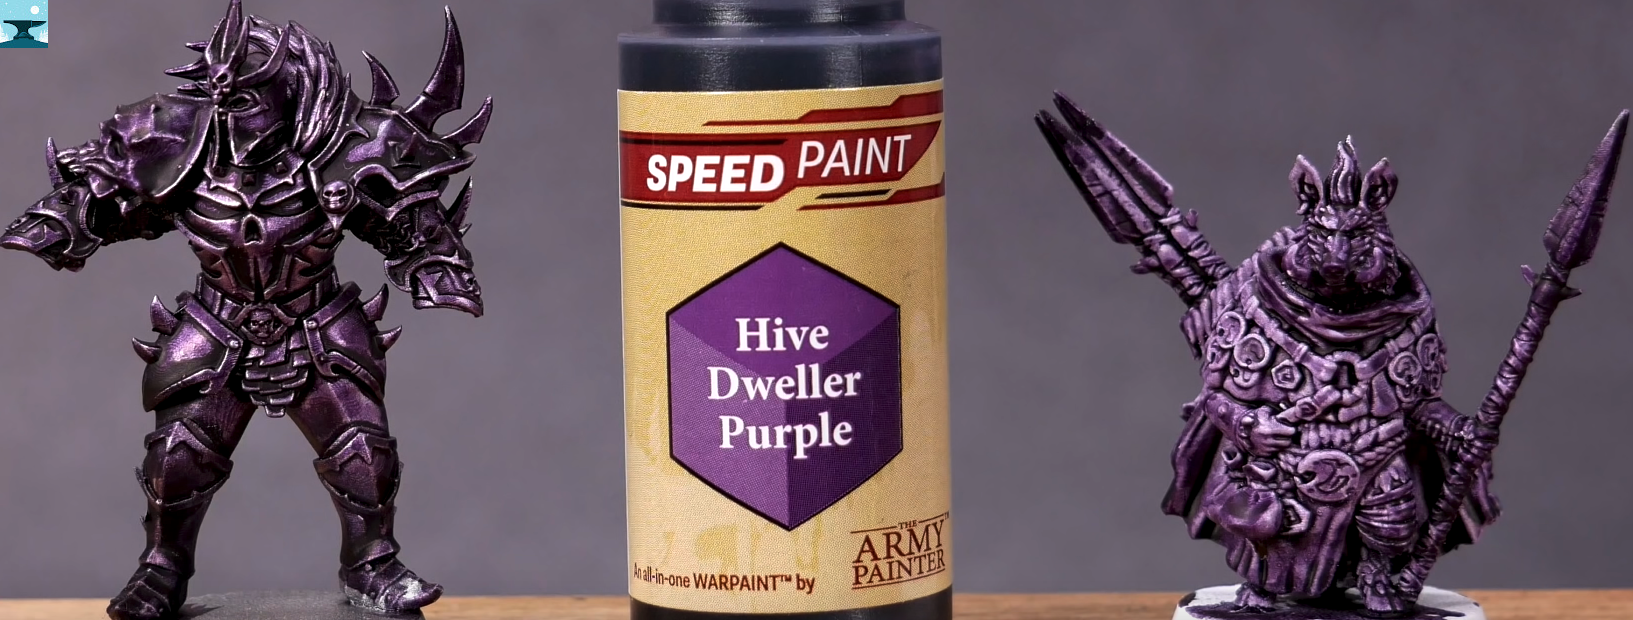
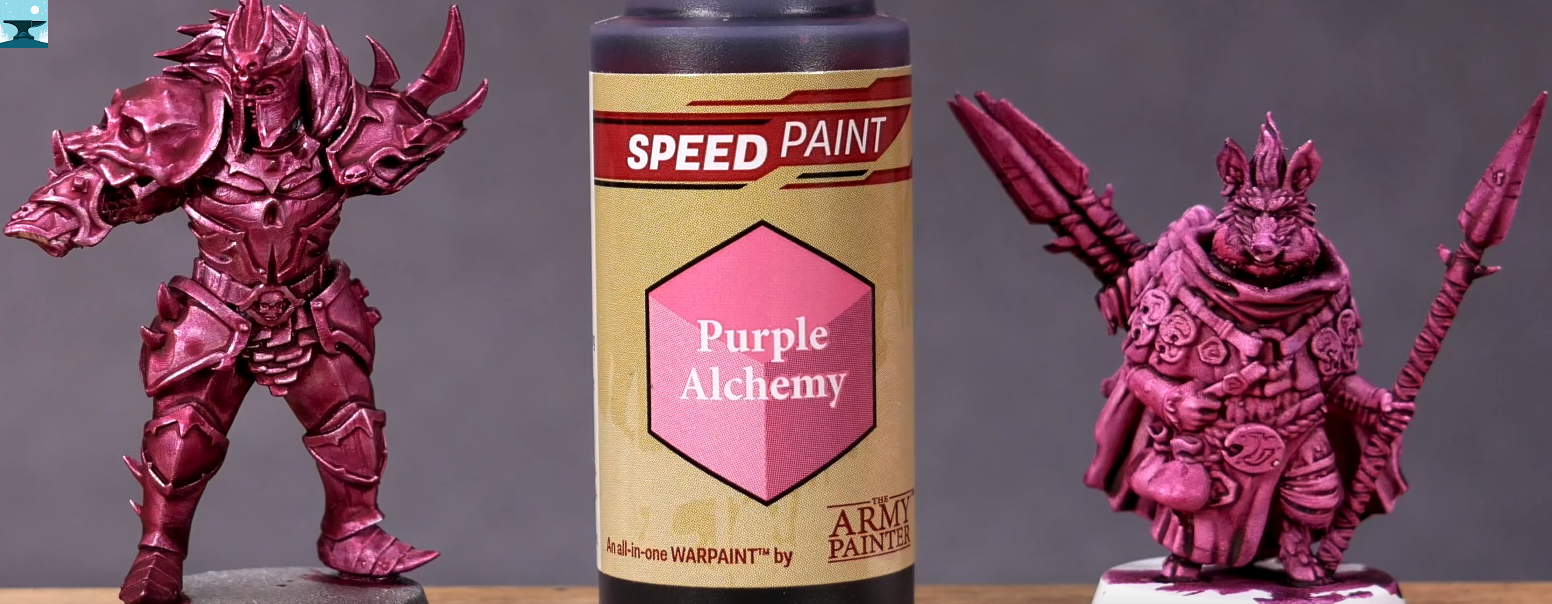
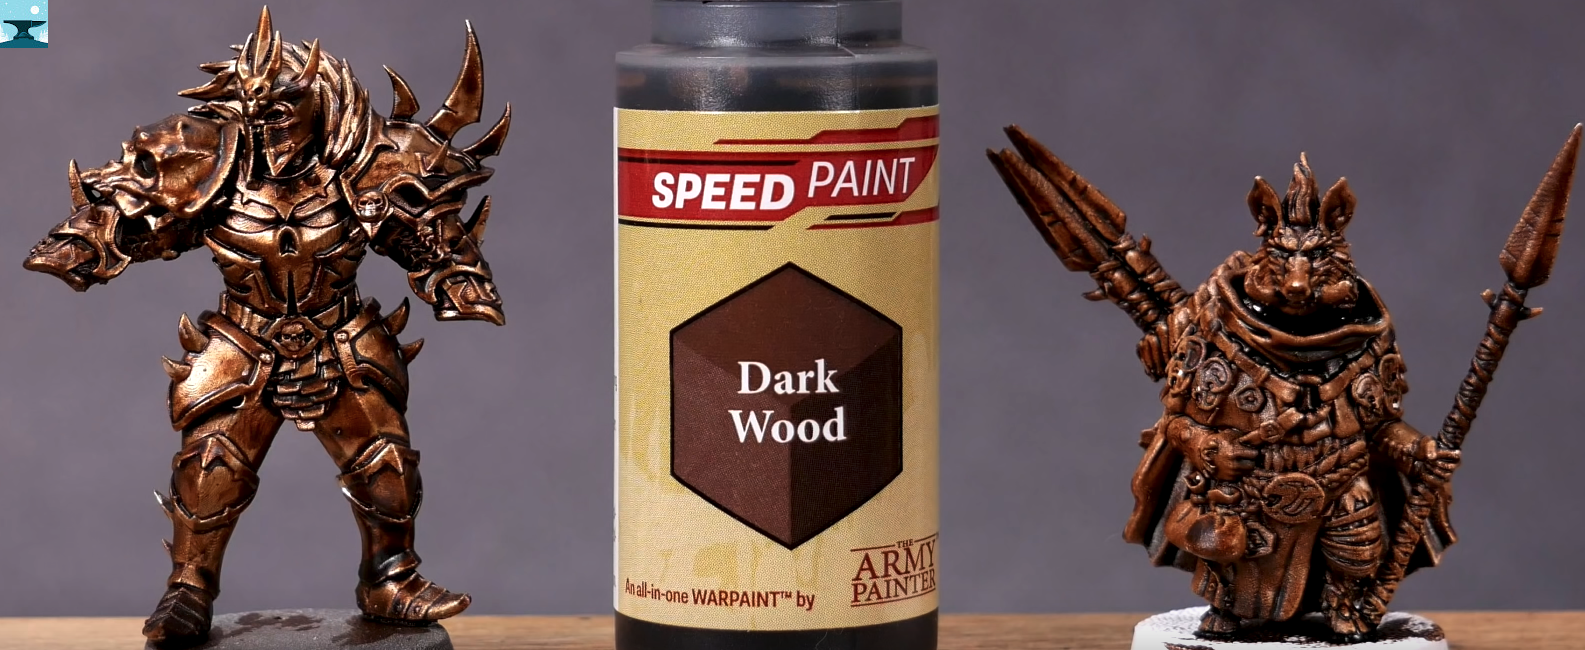
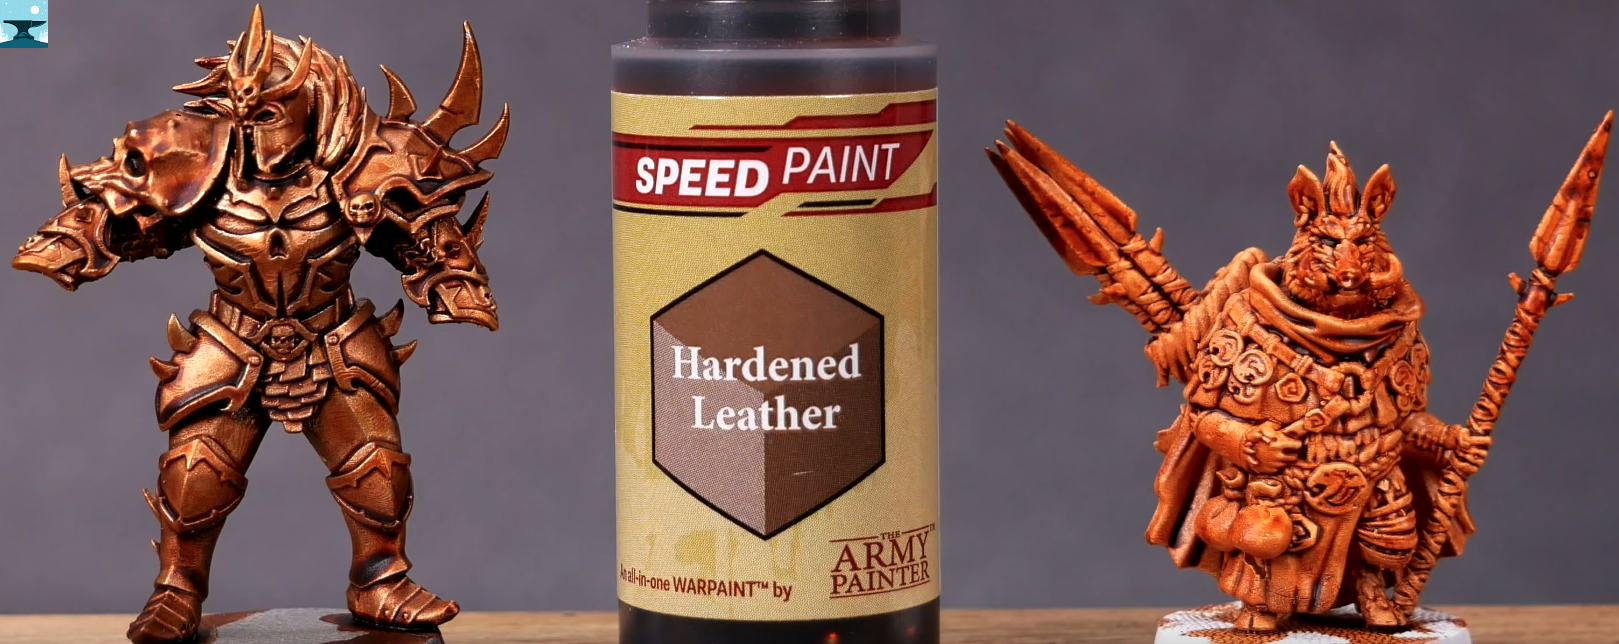
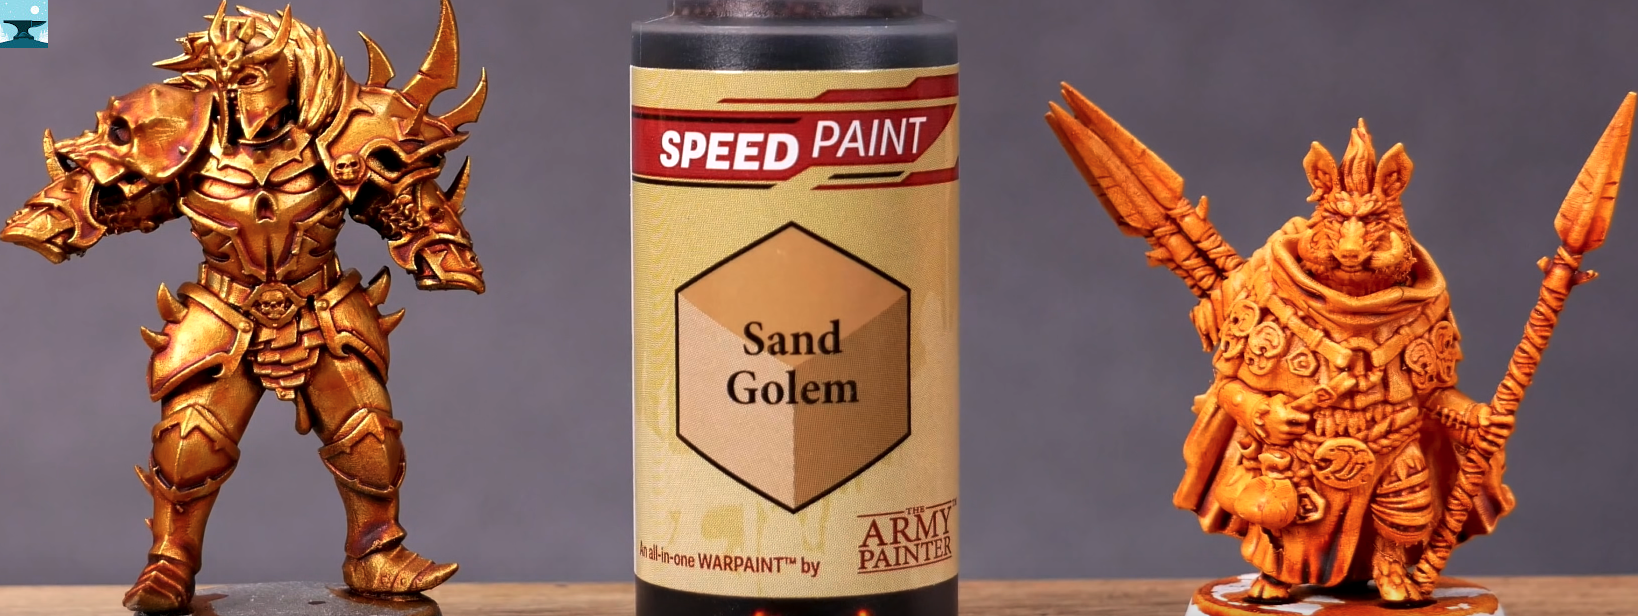
Swatches
Big thanks to Goobertown Hobbies for showing us all the swatches in his video review.
Conclusion
Now that you’ve seen what Speedpaint can and can’t do. All that’s left is for you to decide if it’s the right fit for your goals.
For me, I would likely use the 1 layer approach recommended by The Army Painter and get my bulk done quickly (so I can focus more on using them in game). But when I have a boss monster or something special I will try and follow this sequence:
- Zenithal Highlight for priming, using colored primer
- Dry brush highlights
- Gloss varnish the Zenithal
- Airbrush the shadow base coat (for broad areas)
- Airbrush the highlight base coat (for broad areas)
- Brush in speedpaint for precision areas
- Matt varnish speedpainted areas
- Brush regular acrylic for highlights, glazing, and shadows
- Matt Varnish entire miniature
For talented artists and their workflows when using Speedpaint, check out my Tutorials section (Basic Blood Angel Space Marine, Intermediate Tyranid Broodlord). Please share your comments and experiences below. I’d love to hear your thoughts and why you chose a different flow.

Leave a comment