
Click the title or image of the tutorial you want to jump to.


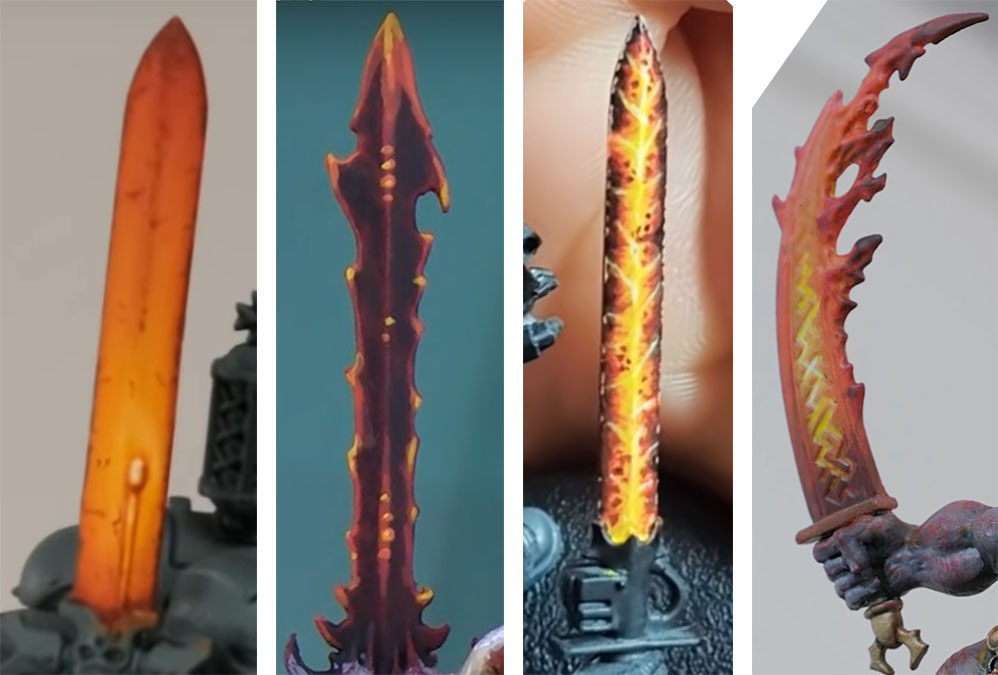
Magma Blade
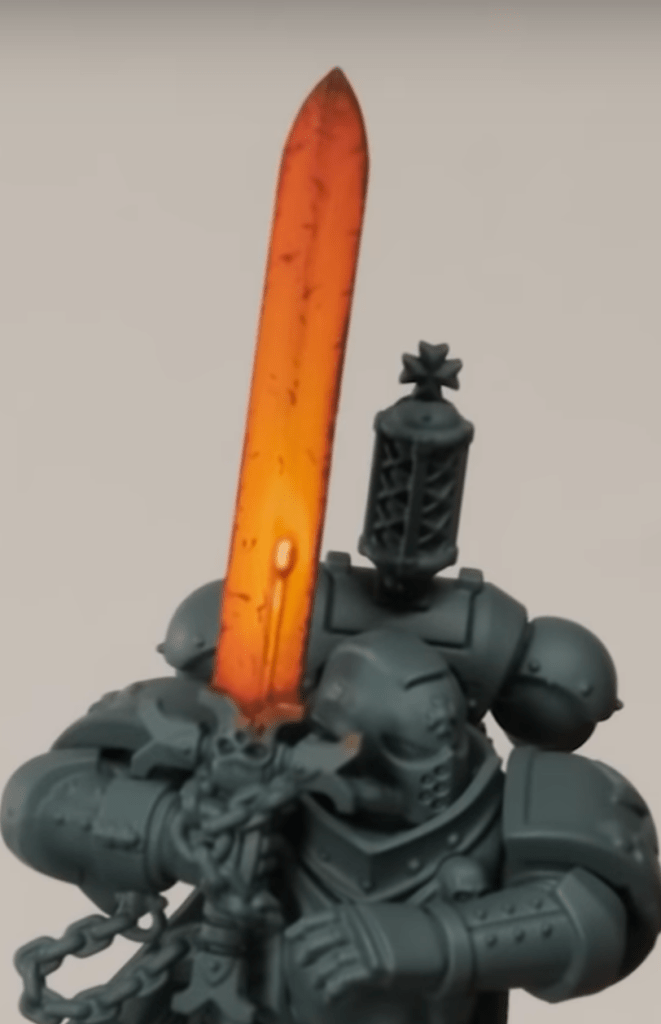
Please check out Duncan Rhodes Painting Academy‘s original video, where he shows and describes in real-time how to paint his Magma Sword.
Summary
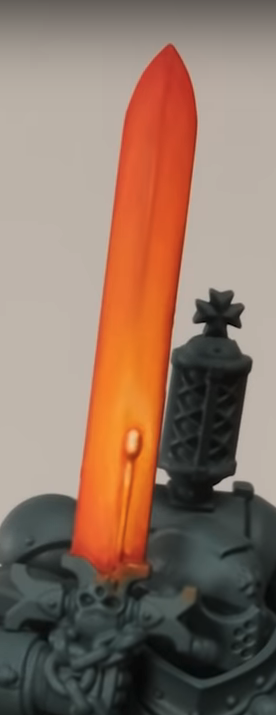
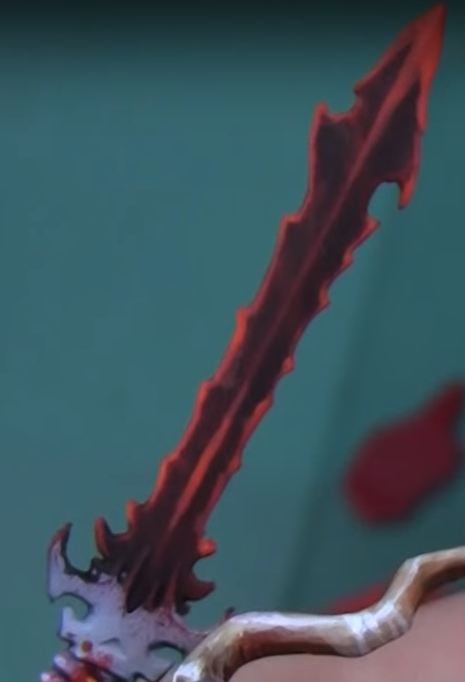
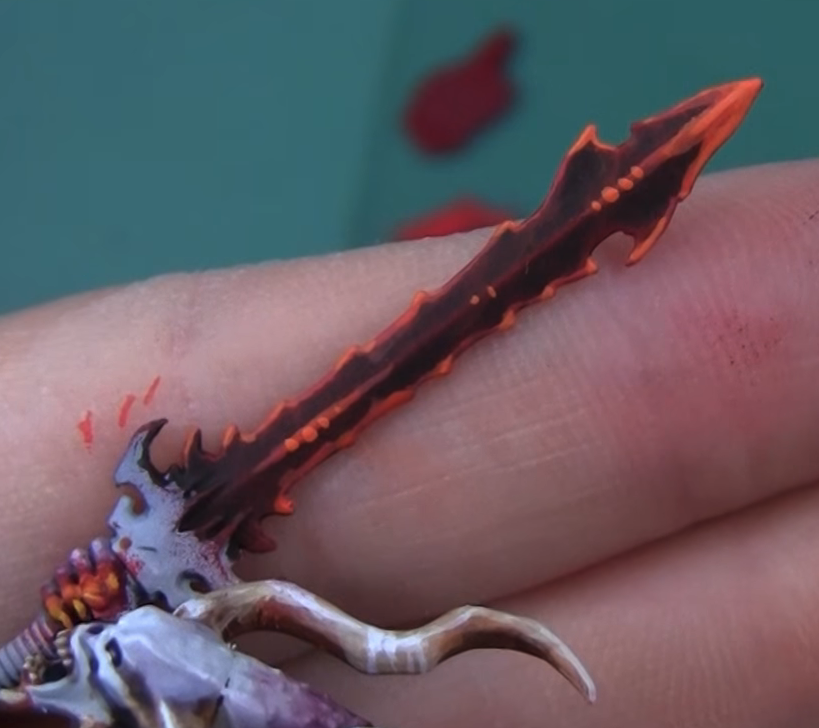
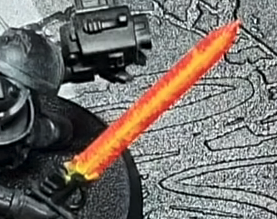
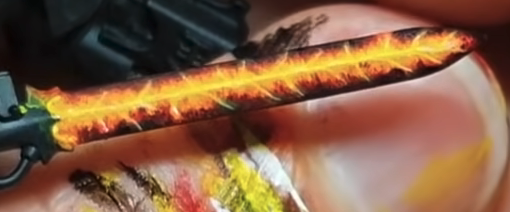
The goal is to have a glowing molten/forged look to the sword. The image below is the reference and the look Duncan is aiming for. A key feature on the model used is the “power node” on the blade which imbues the energetic properties. This node will be the source of the greatest heat. This sword will heavily rely on glazing to achieve the seamless blends/transitions.
Materials
- Citadel Paints – Mechanicus Standard Grey
- Citadel Paints – Evil Sunz Scarlet
- Citadel Paints – Troll Slayer Orange
- Citadel Paints – Flash Gitz Yellow
- The Army Painter – Matt White
- Citadel Paints – Rhinox Hide
- Prime miniature with Citadel – Mechanicus Standard Grey
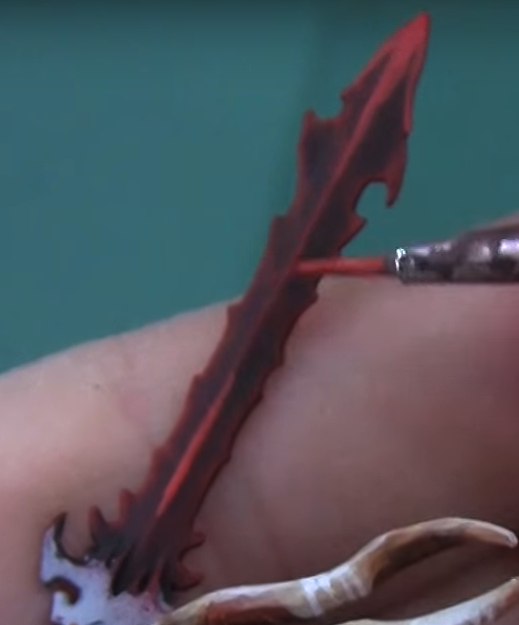
 Citadel – Evil Sunz Scarlet (make sure you thin down to ensure smooth application and avoid unintended textures being added to the model).
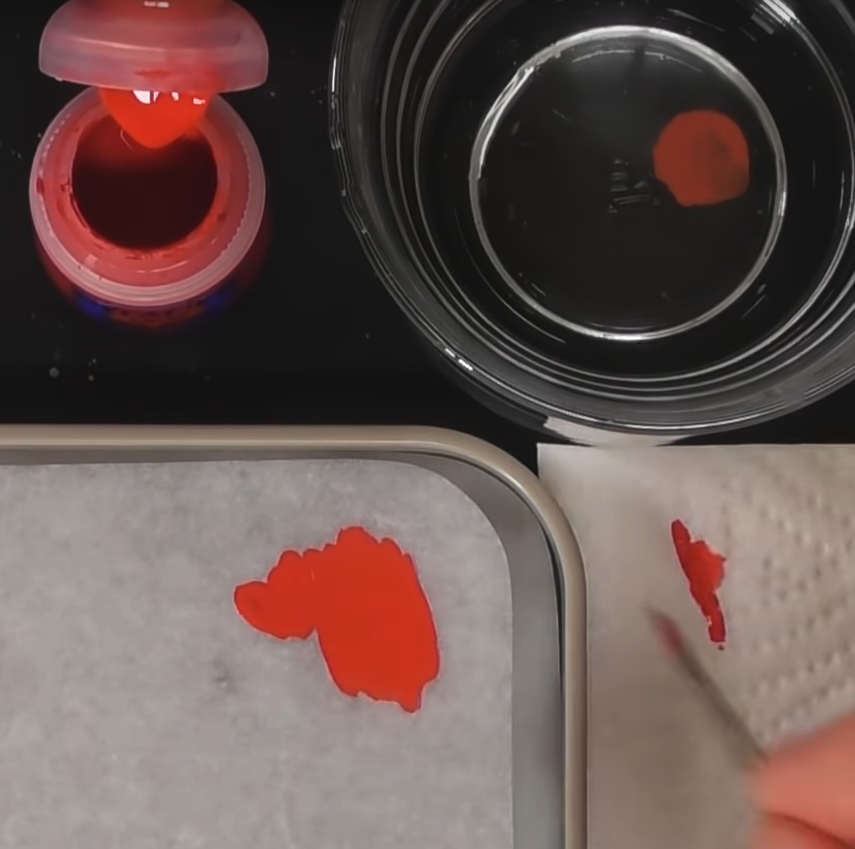
Apply using sweeping motions that full length of the blade. This motion reduces the chance of adding unintended textures.
Apply 2 thin coats letting it dry completely.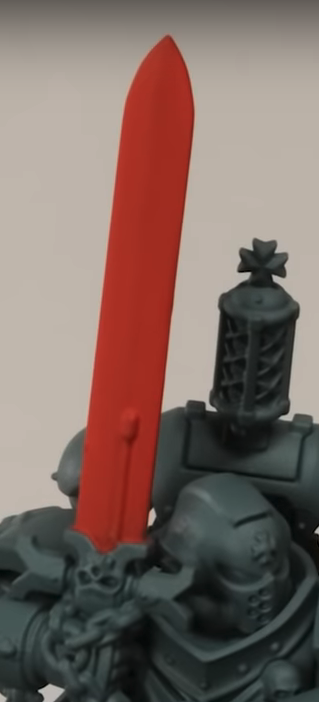
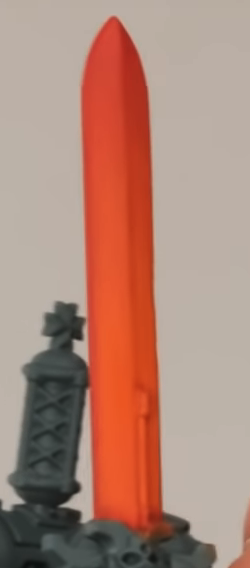
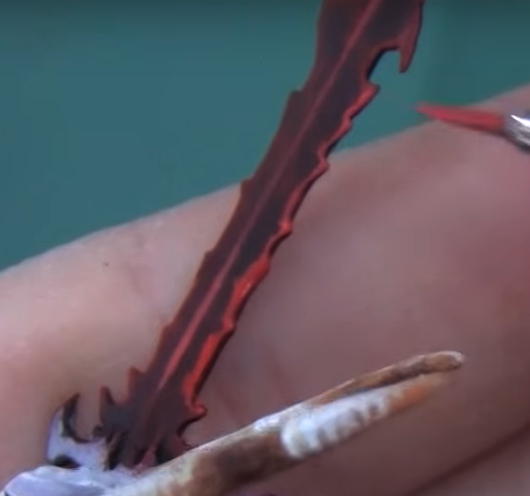
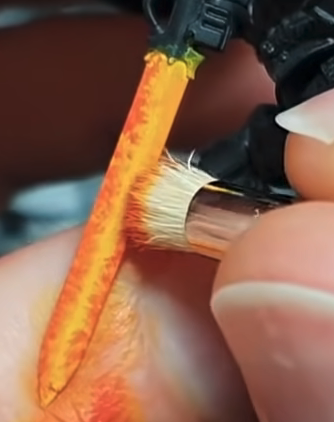
- Citadel – Troll Slayer Orange strongly thinned (very translucent is the goal). He’s creating a glaze here.

The first coat is hard to see, but it dries quickly. The image below shows the first 3 coat progression, and eventually what you see when you’re ready to stop (~6 coats). Each coat covers less of the sword, which provides this nice transition.
 Blend your Citadel – Evil Sunz Scarlet and the Citadel – Troll Slayer Orange glaze
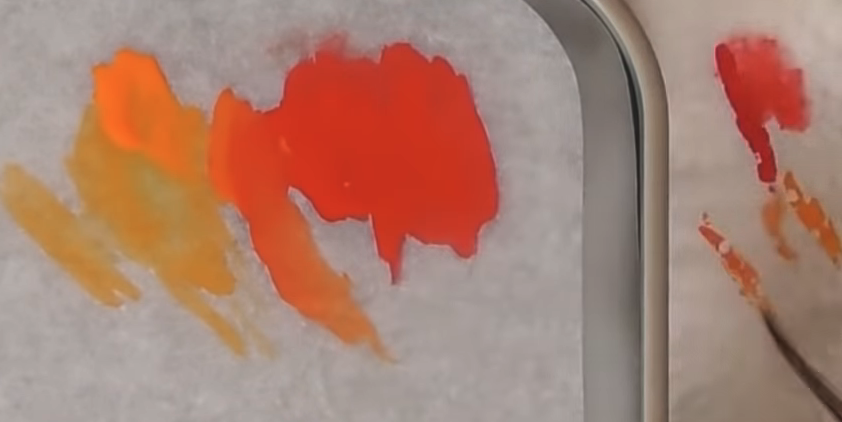
- He applies this blend to 4 key places:
1.) any transition areas which have harsh lines on the face of the blade
2.) the blade edge sides, to suggest sharpness
3.) the raised blade ridge on the face
4.) base of the blade (near the hilt). This section he added more red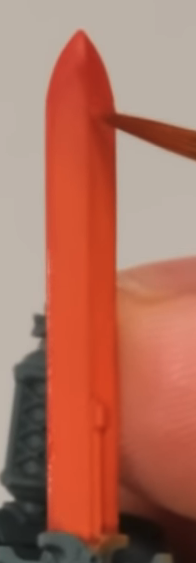
After touch ups it looks like
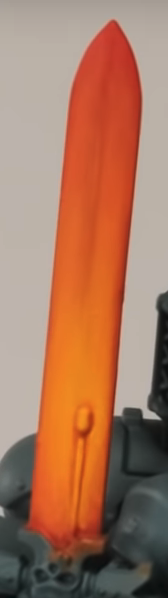
- Blend the Citadel – Troll Slayer Orange glaze and Citadel – Flash Gitz Yellow (adding little bits of water to ensure a glaze consistency)

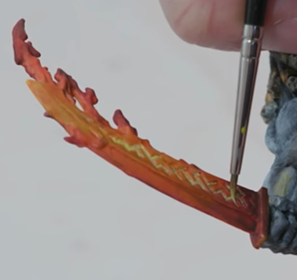
- Using the blend paint more towards the center (since the colors are suggesting greater heat). Be sure to get the node. This will take many coats.
- Still using the blend paint, but use the more yellow version of the blend. This time focus the yellow paint only half way up the blade and on the node.
- Blend The Army Painter – Matt White and Citadel – Flash Gitz Yellow, he then thins it down to a glaze
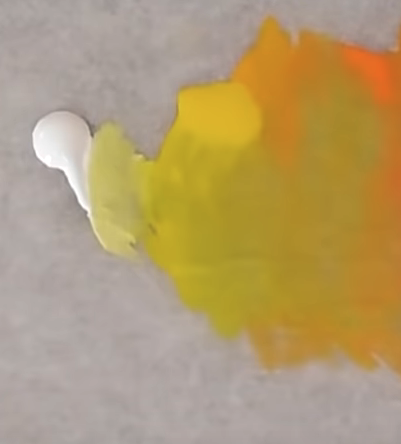
- Brush the blend onto the node and a bit on the top of the cable

- Brush The Army Painter – Matt White on the center of the node
- Blend Citadel Paints – Evil Sunz Scarlet and Citadel Paints – Rhinox Hide (thinning a little to add control).

- Brush the blend on the edges like an edge highlight but not perfect. In particular dot application with breaks in between to give a rough look. He applies this to the blade edges (using the side of the brush) and the face ridge (this is where the choice of size 0 brush becomes more obvious).
Note: He makes a point to draw the brush on the paper towel to remove the excess, since this is going to be fine detail
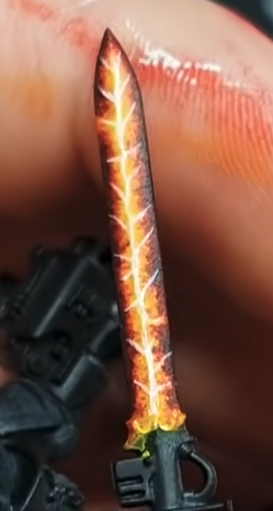
- Blend more Citadel Paints – Rhinox Hide in to darken things
- Brush the new blend with the same strategy as before
- Brush add scratches and imperfections using that latest dark blend

Glowing Ember Sword


Please check out MiniWarGaming Studios‘ original video, where she shows and describes in real-time how to paint her Glowing Ember Sword.
Summary
This ember approach relies heavily on dry brushing and highlighting. Other than a little bit of medium in strategic areas for ease of use, there’s not mixing involved which makes this look very approachable.
Materials
- Citadel Base – Abaddon Black
- Citadel Technical – Lahmian Medium
- Citadel Base – Khorne Red
- Citadel Layer – Evil Sunz Scarlet
- Citadel Layer – Wild Rider Red
- Citadel Layer – Troll Slayer Orange
- Citadel Layer – Fire Dragon Bright
- Citadel Layer – Flash Gitz Yellow
- Mix Citadel Base – Abaddon Black with a little Citadel Technical – Lahmian Medium (used to help the flow)
- Brush the undercoat of the sword with Citadel – Abaddon Black mixture
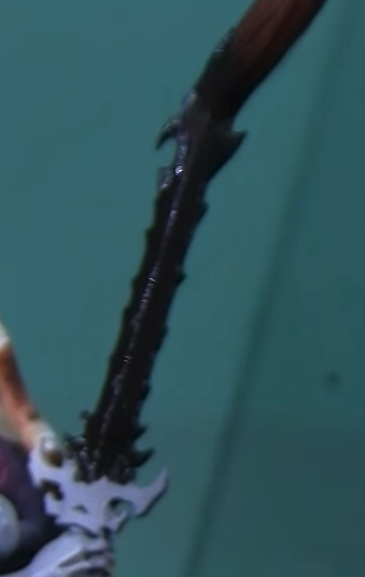
- Dry Brush the Citadel Base – Khorne Red onto the sword. The goal is not to cover all the black but to tint and an leave rough patches

- Dry Brush Citadel Layer – Evil Sunz Scarlet over the edges and center ridge (the relief portions). Be sure to dry brush in both directions, for this highlight. She also uses the side of her brush more than the tip to better catch the edges of the sword.


- Mix Citadel Layer – Wild Rider Red with a little Citadel Technical – Lahmian Medium (used to help the flow)
- Brush Citadel Layer – Wild Rider Red mixture over the tip of the sword

- Brush Citadel Layer – Wild Rider Red mixture over the bottom of the center ridge
- Brush Citadel Layer – Wild Rider Red mixture over the outside edges (using the side of the brush)
- Brush Citadel Layer – Troll Slayer Orange to highlight all the same areas you went over with the Citadel Layer – Wild Rider Red mixture (but cover less and be more selective)
- Brush Citadel Layer – Fire Dragon Bright to highlight all the same areas you went over with the Citadel Layer – Troll Slayer Orange (but cover less and be even more selective). She’s mostly just doing the tips at this point for the relief points.
Note: Use a detail brush for this step.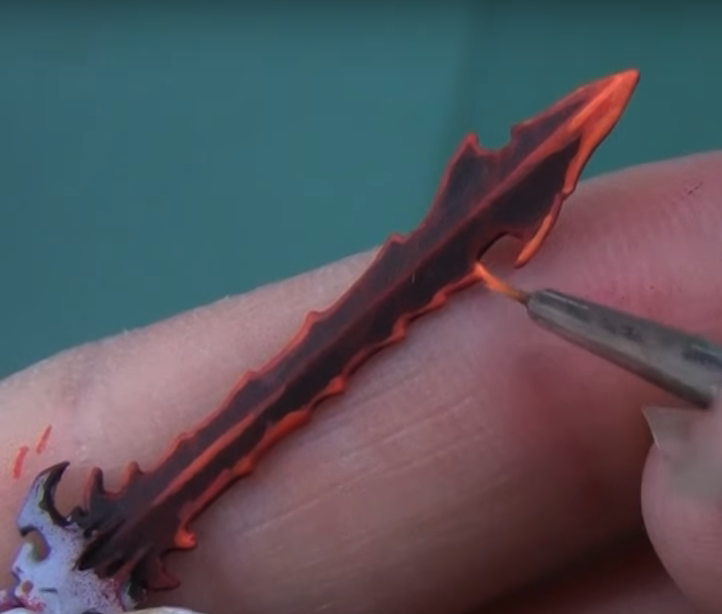
- Brush Citadel Layer – Fire Dragon Bright for the center ridge, applying just dots (this is to emulate the ember effect)
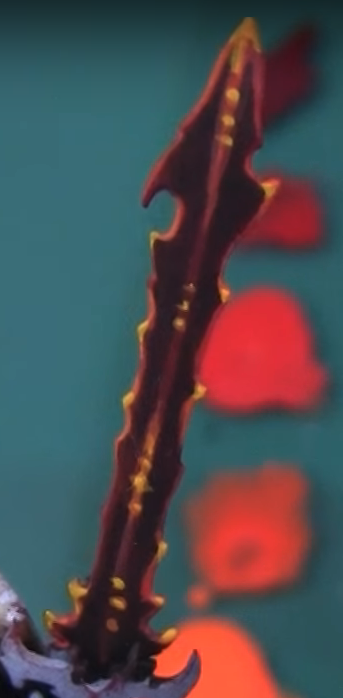
- Brush Citadel Layer – Flash Gitz Yellow on the very tip of the sword, the tips of the edges on the side, and the centers of the ember dots

- All Done!
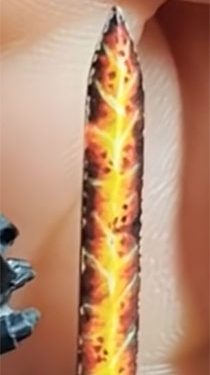
Molten Lava Sword


Please check out Artis Opus‘ original video, where he shows and describes in real-time how to paint his lava sword.
Summary
This tutorial has lots of places you can stop and it still looks amazing. This is a really amazingly detailed molten lava sword. You will need to feel comfortable mixing colors to achieve the various colors he uses.
Materials
- Monument Hobbies – Bright Ivory
- Citadel – Flash Gitz Yellow
- Monument Hobbies ProAcryl – Orange
- Monument Hobbies ProAcryl – Bold Pyrrole Red
- AK Interactive – Burnt Red
- Citadel – Abaddon Black
- Undercoat with Monument Hobbies – Bright Ivory
Note: keep it thin since you want to maintain the details of the weapon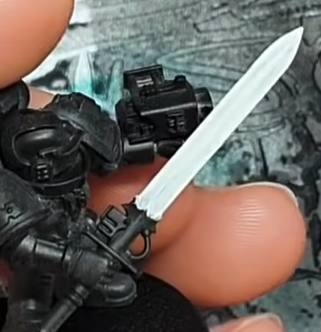
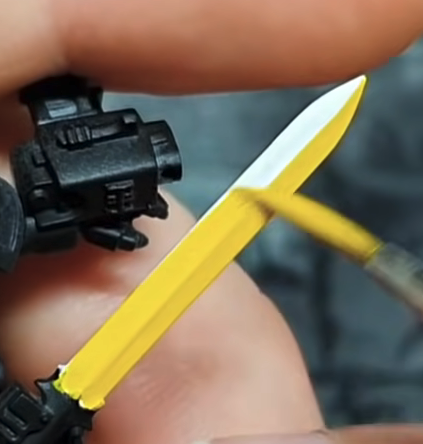
- Brush the entire blade in Citadel – Flash Gitz Yellow
- Blend Citadel – Flash Gitz Yellow with Monument Hobbies ProAcryl – Orange.
Note: only a small amount of ProAcryl, the pigment is really intense. - Stipple the mixed Monument Hobbies ProAcryl – Orange.
Note: Though you can use a traditional brush you’re better off with a small one (with a wide end) and doing wide/heavy stipples.
- Blend more Monument Hobbies ProAcryl – Orange
- Stipple the latest blend of Monument Hobbies ProAcryl – Orange
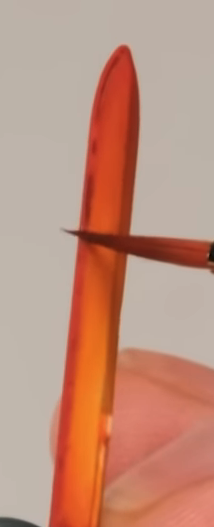
Note: He uses his hand behind the blade because it both gives a firm back and it gives him a target adjacent to the blade for the brush to get the desired coverage.
- Blend in Monument Hobbies ProAcryl – Bold Pyrrole Red (small amount this is very intense)
- Stipple the new blend

- Blend in slightly more Monument Hobbies ProAcryl – Bold Pyrrole Red (small amount this is very intense)
- Stipple the new blend. Aim for less coverage than before

- Blend pure Monument Hobbies ProAcryl – Bold Pyrrole Red with water to make a glaze
- Stipple the glaze within where you stippled before

- Stipple AK Interactive – Burnt Red within where you stippled before
Note: for this section he uses an extra small brush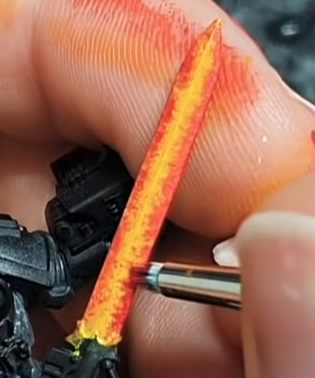
- Blend Monument Hobbies ProAcryl – Bold Pyrrole Red with Citadel – Abandon Black
- Stipple Citadel – Abandon Black mixture within where you stippled before
Note: GO SLOWLY! Be sure to not obscure previous layers completely
- Blend in more Citadel – Abandon Black
- Stipple new Citadel – Abandon Black mixture within where you stippled before. Larger gaps between stipples.


=======OPTIONAL NEXT STEPS=========== - Gently brush Monument Hobbies – Bright Ivory over the center ridge on the face of the blade and create little veins going out from center. Follow any textures you see. Do NOT edge highlight
Note: use the FINEST, SMALLEST brush you have. Also practice before putting this on the model
- Gently glaze Citadel – Flash Gitz Yellow over the white veins

- brush slightly thinned Citadel – Abaddon Black within random sections

- Blend AK Interactive – Burnt Red and Citadel – Abaddon Black
- paint little dots towards the center randomly, using the new mixture. Just a few.

- Blend Monument Hobbies – Bright Ivory and Citadel – Flash Gitz Yellow (this will be used for giving the sword a chipped look)
- paint sharp small lines/dots that look like chips on the edges. Avoid uniform pattern, should be random
note: to view chips from the front you’ll need to do 45 degree angled chips on the face of the blade (because the side of the sword is not visible from the front. This is some what an illusion with paint). See the first image below for the angle and the approach.

- Blend Monument Hobbies – Bright Ivory and your previous mix (this is going to accent areas of interest
- paint sharp small sharp lines sparingly in just a couple areas where you see a lot of detail (this will be a line moving towards the center a long any of of the energy veins you painted before)

- All Done!

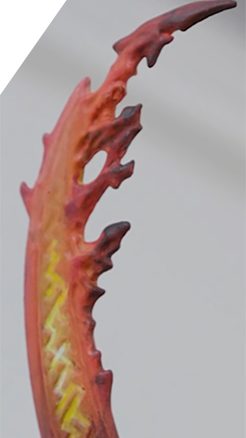
Fire Sword

Please check out Nerd Paints‘ original video, where he shows and describes in real-time how to rebase and paint the entire fire giant. He provides a fantastic amount of detail.
Summary
This tutorial has very little mixing and is rather approachable. It avoids requiring special brushing techniques while still achieving a professional aesthetic.
Materials
- Citadel – Evil Sunz Scarlet
- Citadel – Troll Slayer Orange
- Citadel – Flash Gitz Yellow
- Vallejo – Transparent Orange
- P3 – Morrow White
- Citadel – Abaddon Black
- Prime with white
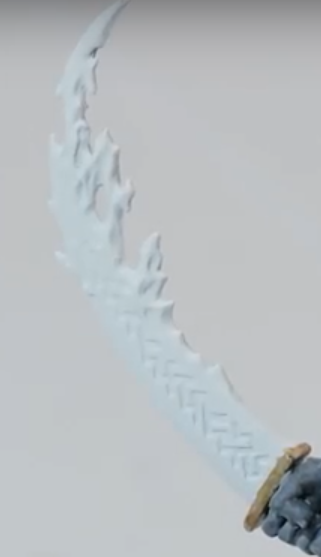
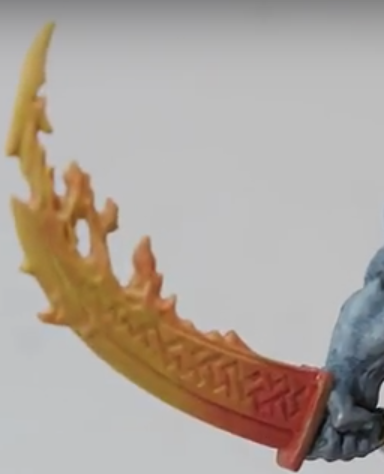
- Brush the entire blade in Citadel – Evil Sunz Scarlet (multiple layers)

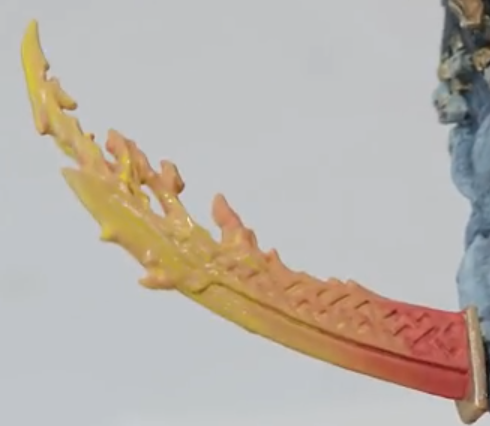
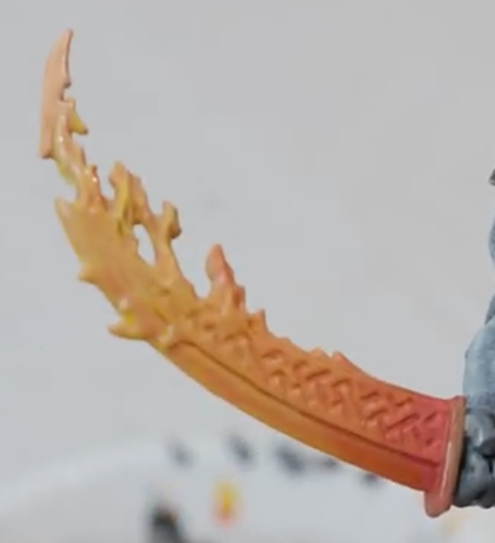
- Brush a thin consistency of Citadel – Troll Slayer Orange (a heavy Glaze), from the tip of the blade down. Aim to keep the bottom where the hilt meets the sword to remain red. This may take 2 to 3 layers.

- Brush a thin consistency of Citadel – Flash Gitz Yellow (a heavy Glaze), from the tip of the blade down. Aim to keep the bottom where the hilt meets the sword to remain red. This may take 2 to 3 layers.
- Blend Citadel – Troll Slayer Orange and Citadel – Flash Gitz Yellow
- Glaze the hilt of the sword (this is for OSL)

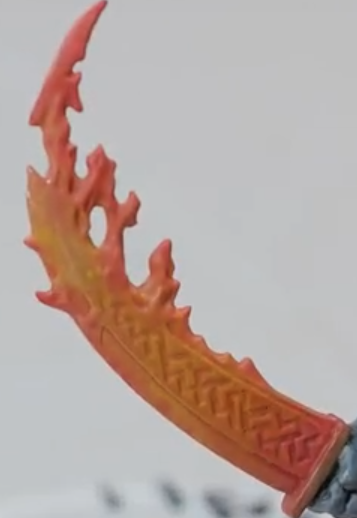
- Glaze using Vallejo – Transparent Orange (undiluted) from just above the bottom of the sword up to the yellow. This will help blend the colors. We’re trying to still keep the red at the base and the yellow at the tip
- Brush over the flames themselves with Citadel – Evil Sunz Scarlet
- Glaze the tip of the sword’s blade with a thinned P3 – Morrow White
- Blend Citadel Base – Abaddon Black and Citadel – Evil Sunz Scarlet (this is for the progression of smokey look)
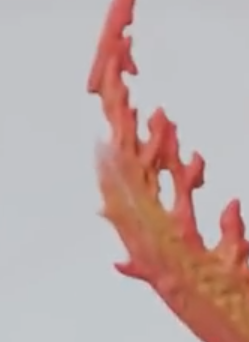
- Glaze with the new mixture lightly at the bottom of the sword and the tips of the flames (this starts the transition to smoke)


- Glaze the same mixture over the hilt of the sword

- Glaze using Vallejo – Transparent Orange (undiluted) over the areas in the middle up to where the red blends in.

- Blend P3 – Morrow White and Citadel – Flash Gitz Yellow (thin it out, roughly 1:1:1 (white:yellow:water)
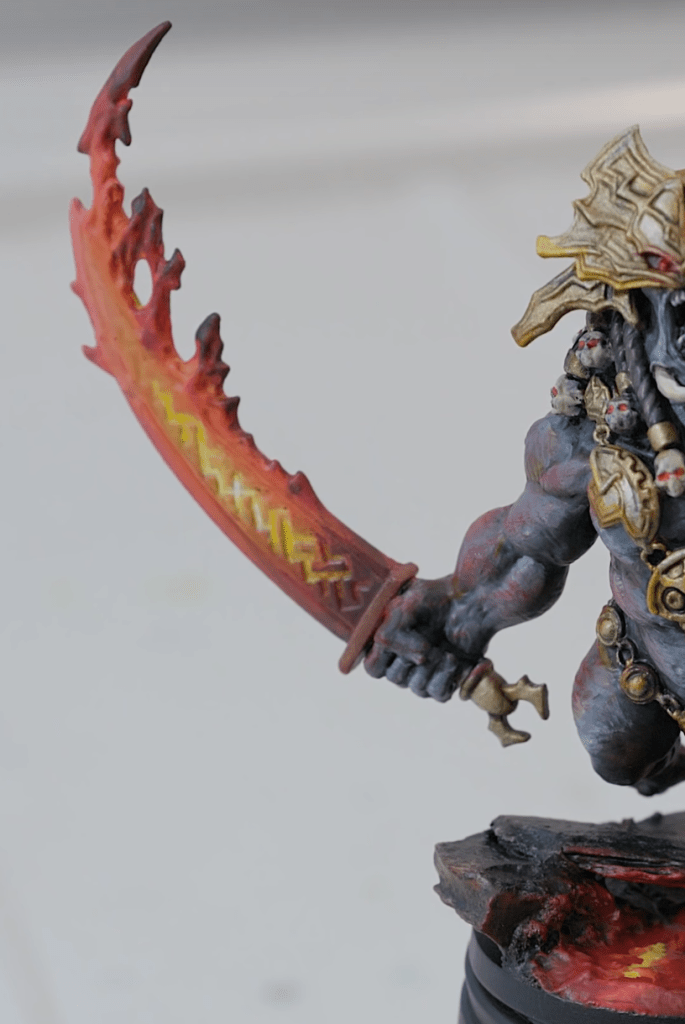
- Take this new mixture and fill in the runes of the sword
- Brush P3 – Morrow White over the runes in the middle of the sword. This indicates where the heat is emanating from.

- All Done!!


Leave a comment