
Please check out Gravehammer‘s original video, where he shows and describes in real-time how to paint his Chaos Warrior from scratch.
Summary
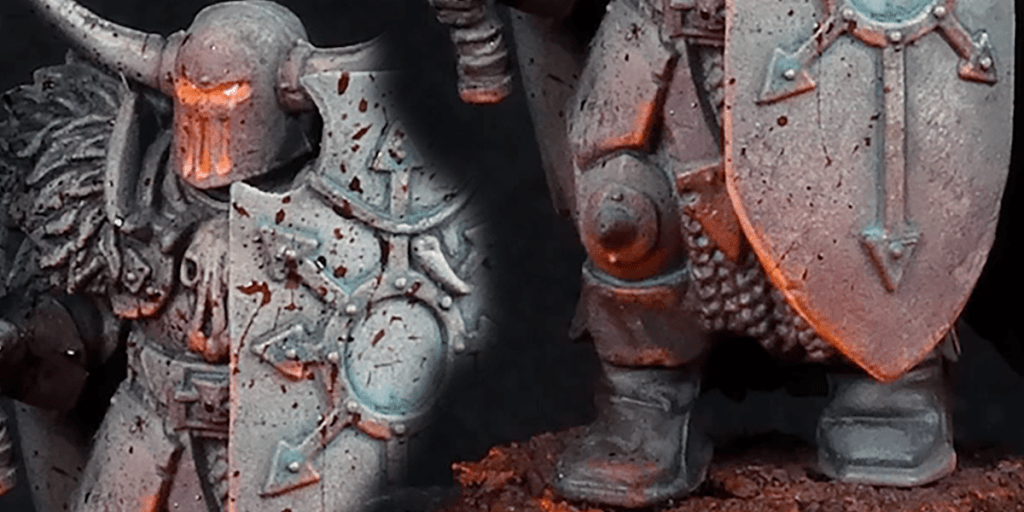
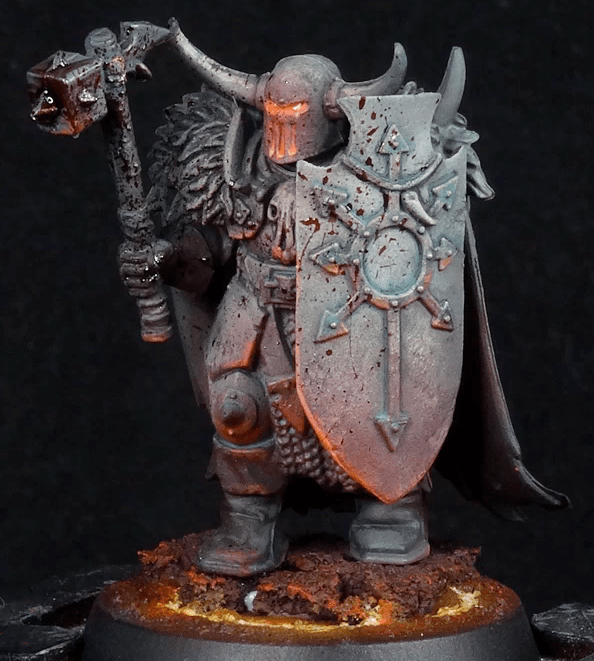
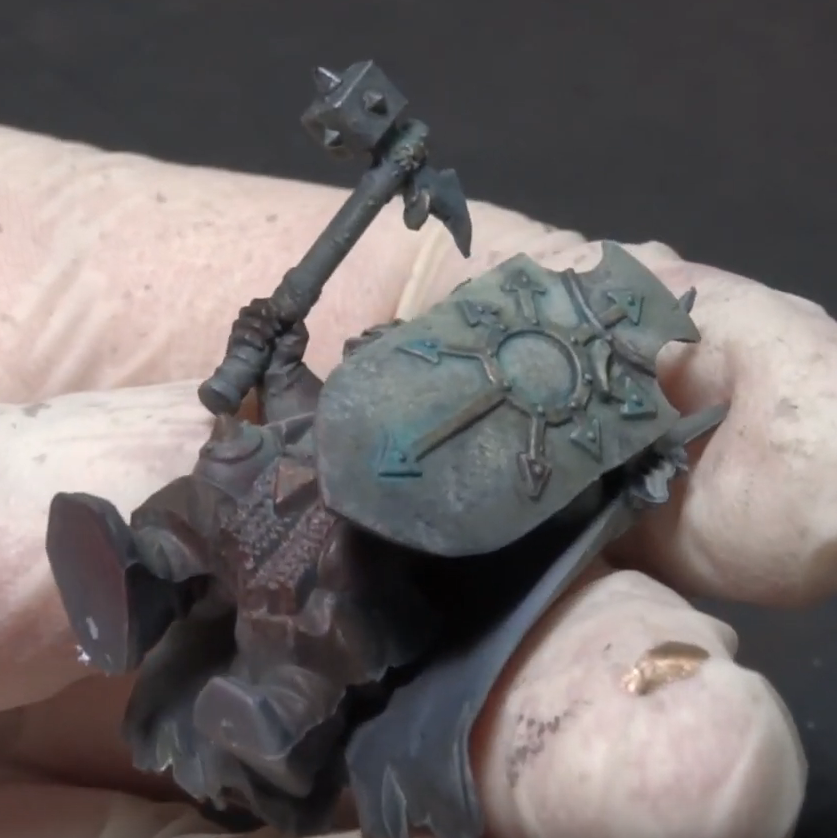
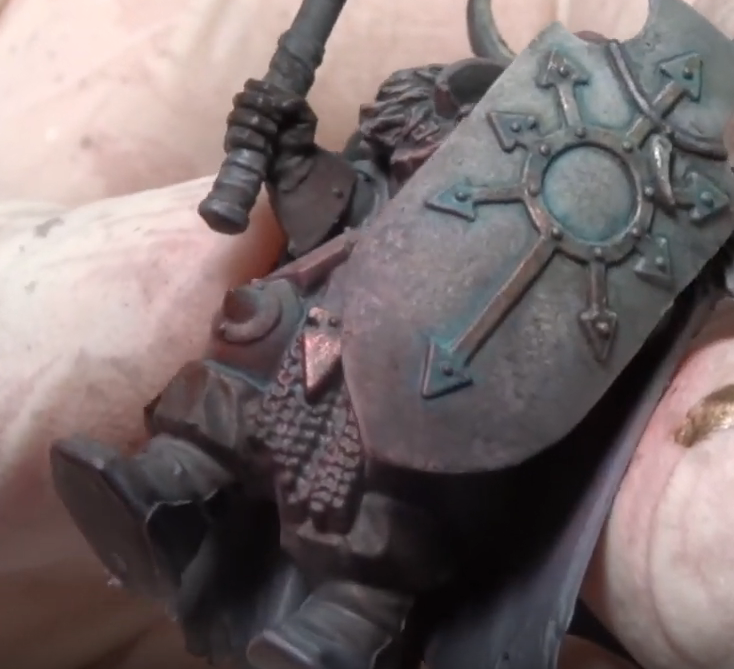
The focus of this tutorial is the object source lighting (OSL) component of the miniature. A key aspect of the success of OSL is the contrast of color. What we see is the use of warm colors (red) for the glow on top of cold accents (blue) and neutrals. The glow itself is a lighter color versus the rest of the miniature which is dark. These contrasts make the glow feel more intense and easier to recognize without having to break the dark theme.
This tutorial can be thought of as 2 parts: the OSL for the miniature and the actual source of the light (the lava base). The painting of the miniature in the grimdark theme are alluded to but the breakdown of steps are reserved for the OSL. If you would like to learn how to paint the Chaos Warrior, please watch the original video.
Materials (Chaos Warrior)
- Scale75 – Miskatonic Grey
- White Paint
- Acrylic Medium (this is never clarified. My educated guess is Liquitex Matte Medium since the desired look is matte — despite it being used for glow)
- Vallejo Red Ink
- Vallejo Fluorescent Red
Materials (Lava Base)
- Prime the miniature in black, followed by zenithal priming the miniature with Miskatonic Grey. This was applied using an airbrush focusing on the head, armor plating, and shield.


- He then paints the miniature with acrylics but then uses an enamel wash to make everything look muddy. The style he’s going for is called Grimdark.
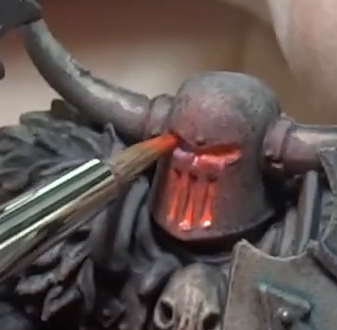
- [Brush] Paint the eyes with White (diluted with acrylic medium)

- [Airbrush] Spray Vallejo Red Ink onto the face. A quick light pass is sufficient
- [Airbrush] Hold the miniature upside down and do a reverse zenithal with the Vallejo Red Ink. This is to mimic the glow that will come from the base (which will be lava).
- [Airbrush] Continue holding the miniature upside down and add more layers using the same reverse zenithal approach with the Vallejo Red Ink. The ink should go from the bottom of the miniature to halfway up the chest plate. In particular you want to build a heavier layers at the bottom. This is to mimic the effect that light is stronger when it’s closer to the source (the lava – base).
- [Airbrush] Same process as step 6 (above) but with the backside cape

- [Airbrush] Spray the bottom very lightly (like a glaze) with Vallejo Fluorescent Red. Later steps will use a brush and bring increased interest to the details.


- [Brush] Paint the eyes and grill with Vallejo Fluorescent Red
- [Brush] Paint the bottoms of things facing down with the Vallejo Fluorescent Red. This encompasses both edges and flat panels (like sections of his knee pads). This can be thought of as a reverse highlight, since the light is from below.
An important thing to notice with his technique for painting is that he’s using the side of the tip of the brush to paint the effect.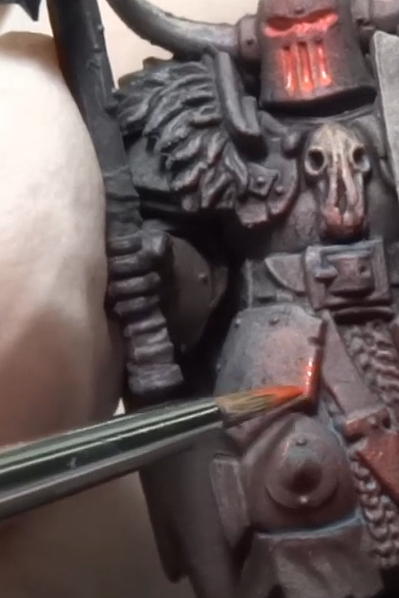

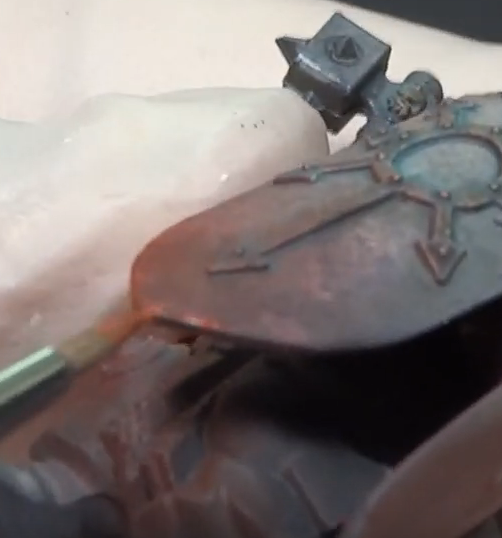
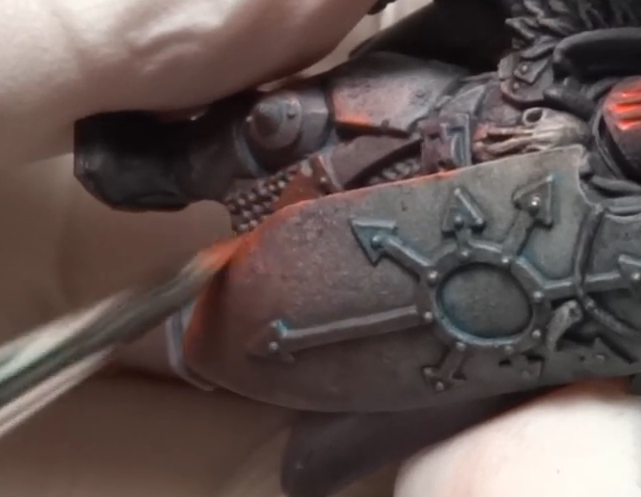

- [Brush] Be sure to edge highlight the insignia relief! Paint the Vallejo Fluorescent Red on the bottom edges of the symbol on the shield. This in particular is a focal point of the miniature (which was why we zenithal highlighted it with more light paint — to make it catch more attention).

- [Brush] Paint the bottoms of the cape following the folds and also the holes with Vallejo Fluorescent Red. His placement of the paint at this step is more generous because he’s going for a more artistic purposes (dramatic effect) than realism.

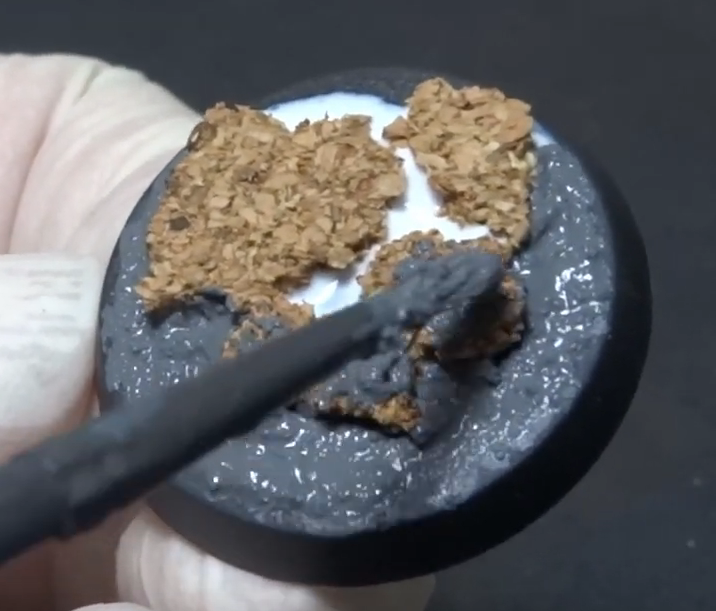
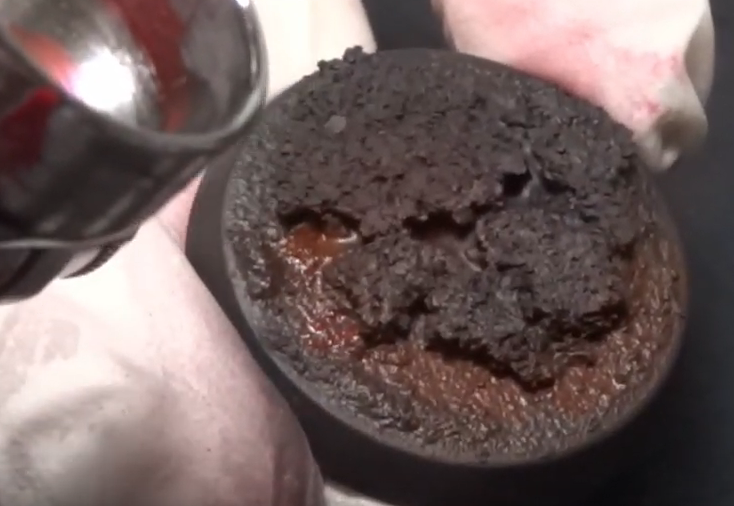
- Create the base by using hobby glue and 3mm cork
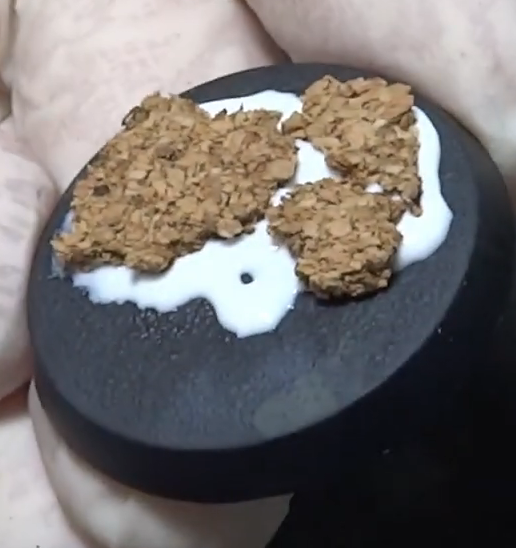
- [Brush] Citadel – Technical – Astrogranite texture paint over the base but not completely covering the cork
- [Airbrush] Prime the base with black then do the ground area with Green Stuff World – Cutthroat Red or Citadel – Base – Mephiston Red. Specifically you’re targeting near the place where the cork meets the disk. You’re going to have over-spray but this will help with the glow effect of the lava.

- [Airbrush] Spray a narrower band close the base of the cork with Green Stuff World – Hellfire Red or Citadel – Layer – Evil Sunz Scarlet.
- [Airbrush] Averlan Sunset or Ember Orange for the glow

- [Brush] Paint streaks of Green Stuff World – Ember Orange or Citadel – Base – Averland Sunset for warmest part (the center of the lava flows).
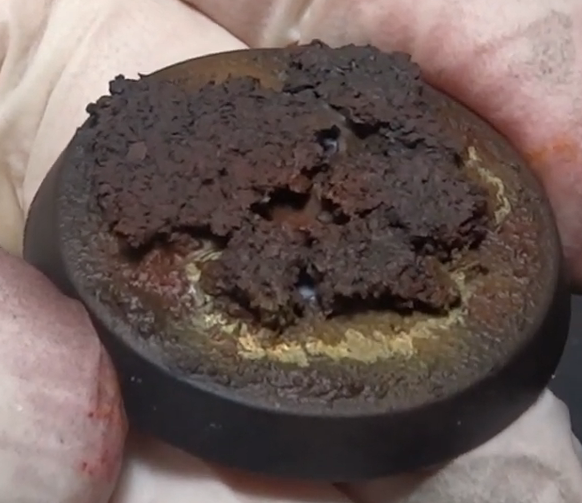
- [Brush] Add to the center of the streaks Green Stuff World – Ivory Tusk

- Base is complete

- Entire Miniature is Complete


Leave a comment